Airtel DLT Registration Process
This guide is for businesses registering on Airtel DLT to send OTP, transactional, service, or promotional SMS in India as per TRAI guidelines.
What Is Airtel DLT Registration?
Airtel DLT registration is the process of registering your business principal entity ID on Airtel’s Distributed Ledger Technology (DLT) platform to send commercial SMS in India.
It is mandatory under TRAI regulations for sending transactional, promotional, service and OTP SMS.
Businesses can create principal identity, register Sender IDs (Headers) and get message templates approved on a blockchain-based system.
This ensures that only authorized and verified businesses can send SMS and prevent spam and fraudulent messages.
Your Entity ID, Headers, and Templates are automatically synced across other telecom operators. It allows you to send SMS nationwide without registering separately on each platform.
Documents Required for DLT Registration in India
To complete DLT registration in India, businesses must submit basic documents to verify identity, address, and authorization. Requirements may vary slightly based on business type (Individual, Proprietorship, or Private Limited), so it’s best to keep soft copies of all documents ready for online upload.
Business Identity Proof()
- Business PAN Card (mandatory)
- For sole proprietors, personal PAN may be accepted
Business Entity & Address Proof (Any one or more)
- GST Registration Certificate
- Certificate of Incorporation (for companies)
- Shop & Establishment Certificate
- MSME / Udyam Registration Certificate
Authorization Documents
- Letter of Authorization (LOA): On company letterhead, authorizing a person to complete DLT registration (format as per DLT portal guidelines)
- Authorized Signatory ID Proof: Aadhaar Card, Passport, or Voter ID
Contact Details
- Valid business Email Address
- Registered Mobile Number (required for OTP verification)
Keeping a soft copy of these documents ready for faster DLT approval and avoids delays during registration.
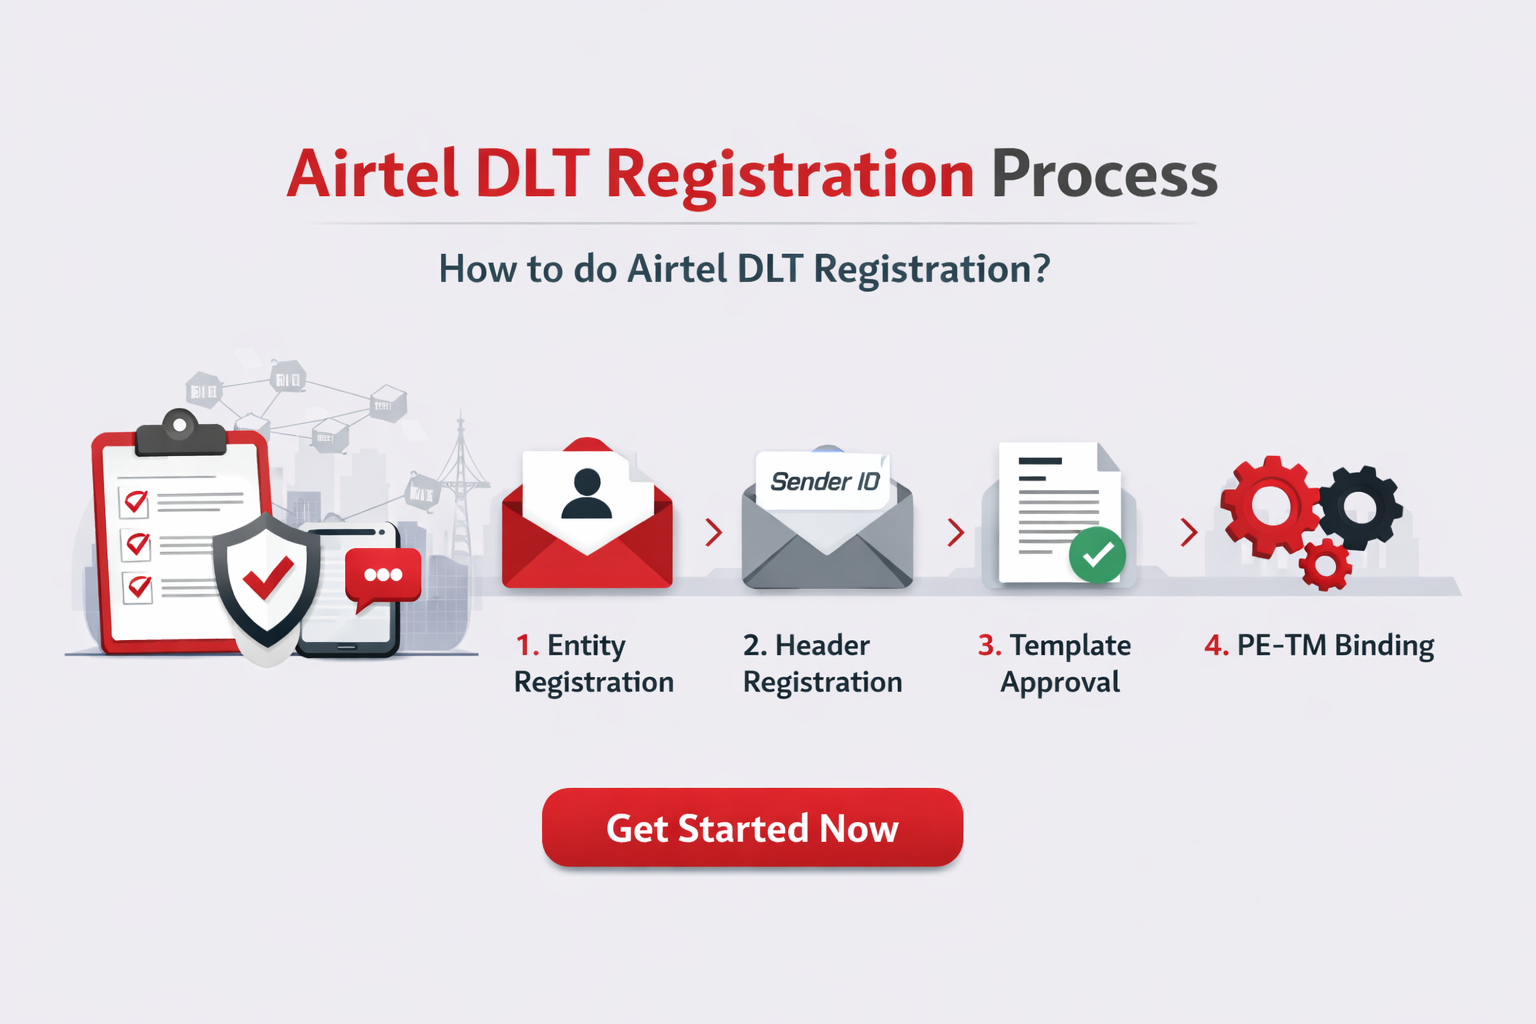
Airtel DLT registration (step by step guide)
The Airtel DLT registration process starts by creating a login on the official Airtel DLT portal. Follow the steps below to register your business and get compliant for sending SMS in India.
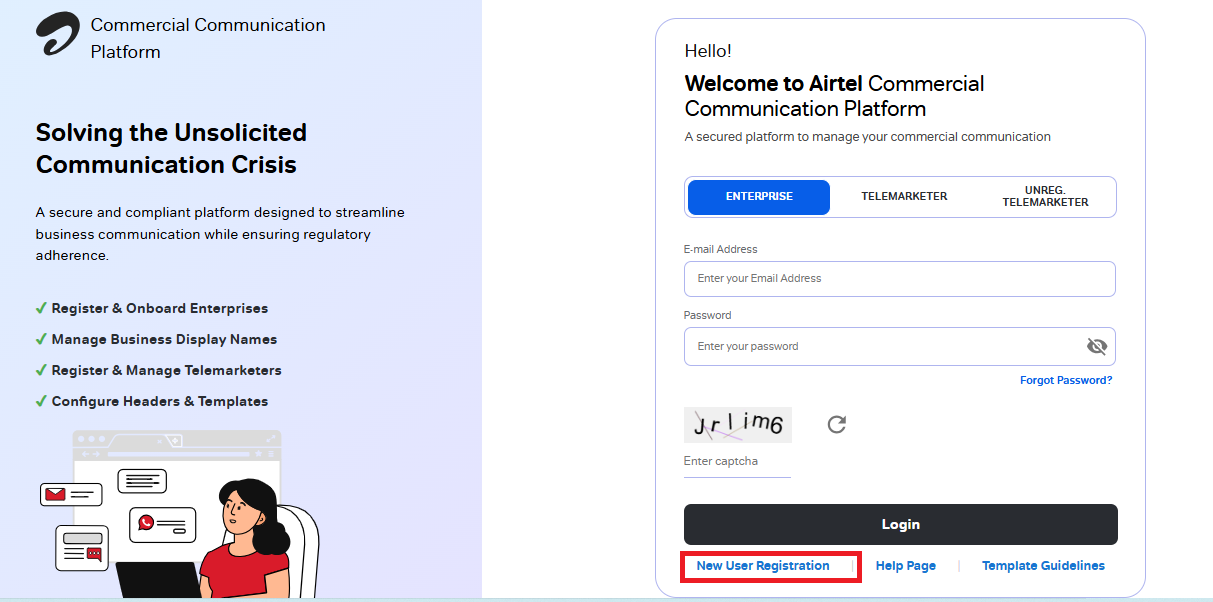
Visit the Airtel DLT Portal
Go to the official Airtel DLT website:
https://www.airtel.in/business/commercial-communication/home
Click on New User Registration to begin the registration process.
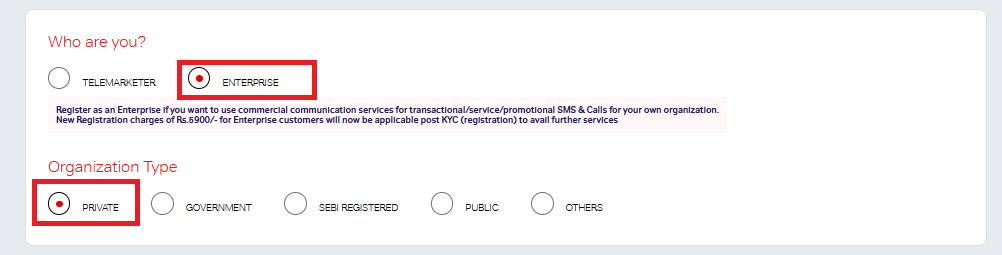
Step 1: Entity Registration
Choose Registration Type
During registration, you will see two options:
- Telemarketer
- Enterprise
Both registration flows are similar, but they differ in document requirements and applicable charges.
For business SMS sending, select “Enterprise”.
Next, choose your Organization Type. Airtel offers multiple options, select the one that best matches your business structure. For most companies, select Private to proceed.
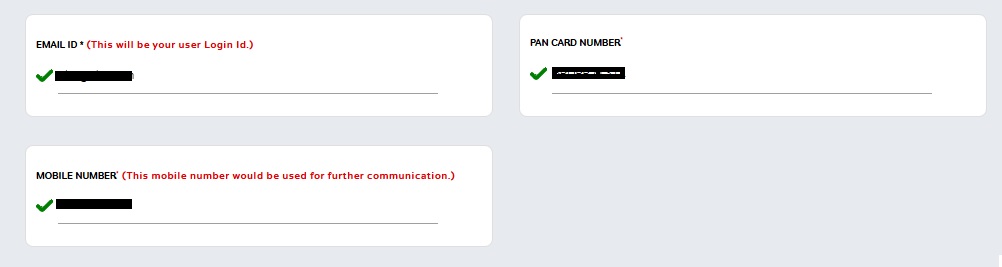
Enter the required login details:
- Business email ID
- Mobile number (for OTP verification)
- PAN number
These details will be used for future access to the Airtel DLT portal.
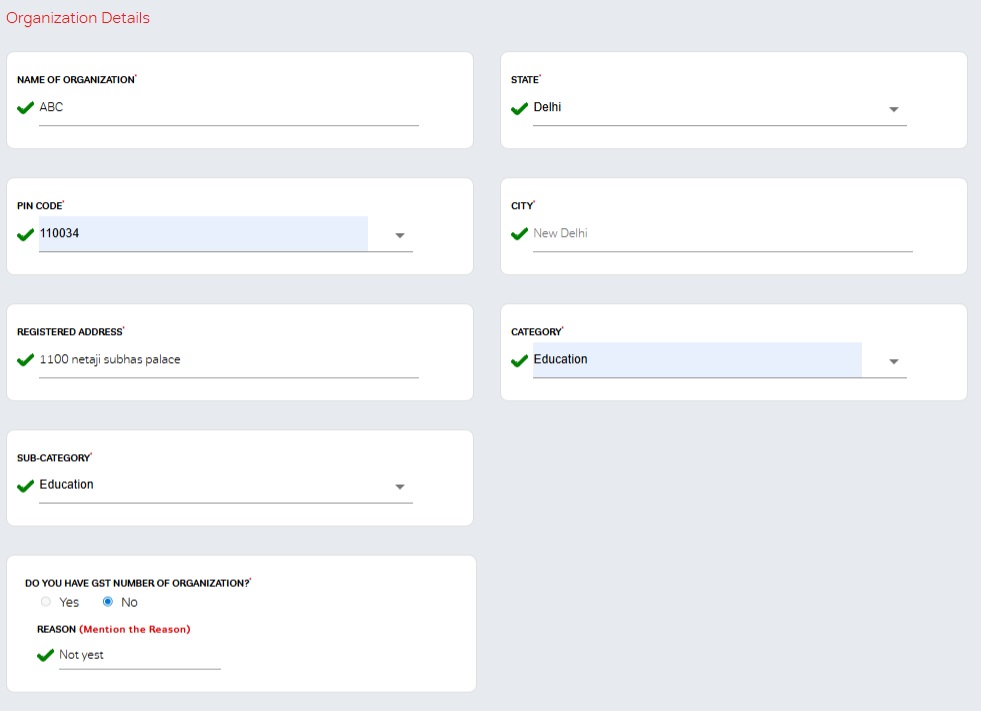
Fill Organization Details
Provide your business information, including:
- Organization name
- Registered business address
Select your business category and sub-category from the predefined options available on the portal. Choose the category that best represents your business activities.
Enter your GST number. If your business is not GST-registered, select the appropriate reason provided on the portal.
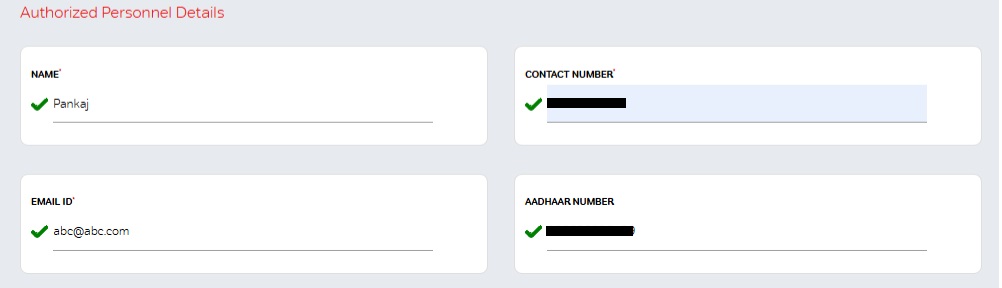
Add Authorized Person Details
Enter details of the authorized person who will manage DLT activities on behalf of the organization:
- Full name
- Contact number
- Email ID
- Aadhaar details
This person will be responsible for managing Sender IDs, templates, and approvals.
Select Communication Types
Choose the type of commercial communication your business will send:
- Transactional
- Service
- Promotional
You can select SMS and Voice channels.
Recommended: Select all options to avoid limitations in future messaging use cases.
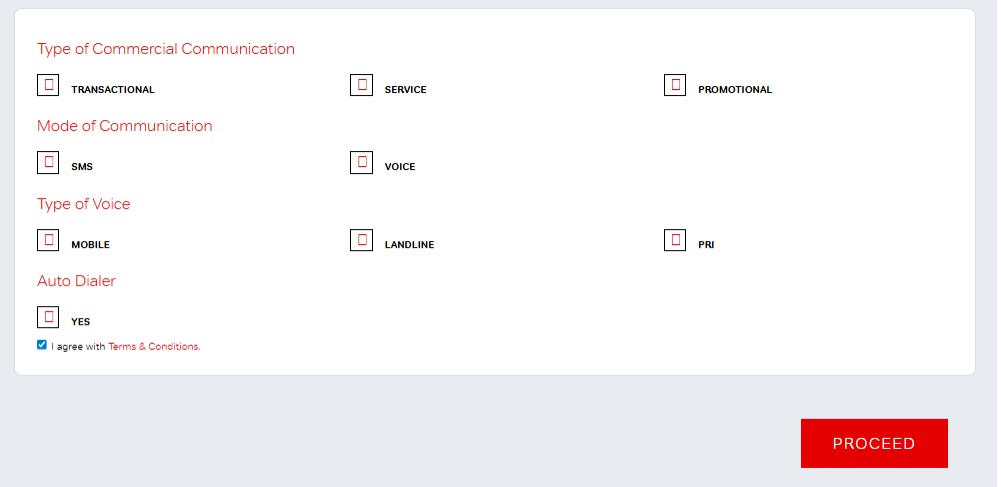
Accept Terms & Submit
Review the details carefully, then:
- Agree to the Terms & Conditions
- Click on the “Proceed” button to submit your registration
Account Validation
Next, you will receive the OTP on the given mobile number and email address.
Enter the received OTPs.
Click on the” Submit” button.
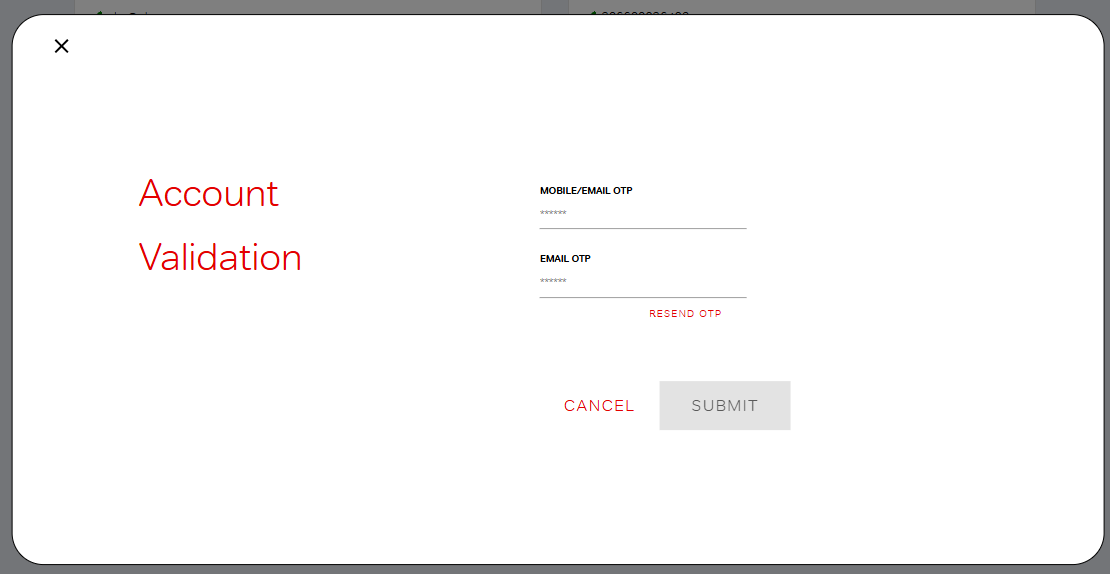
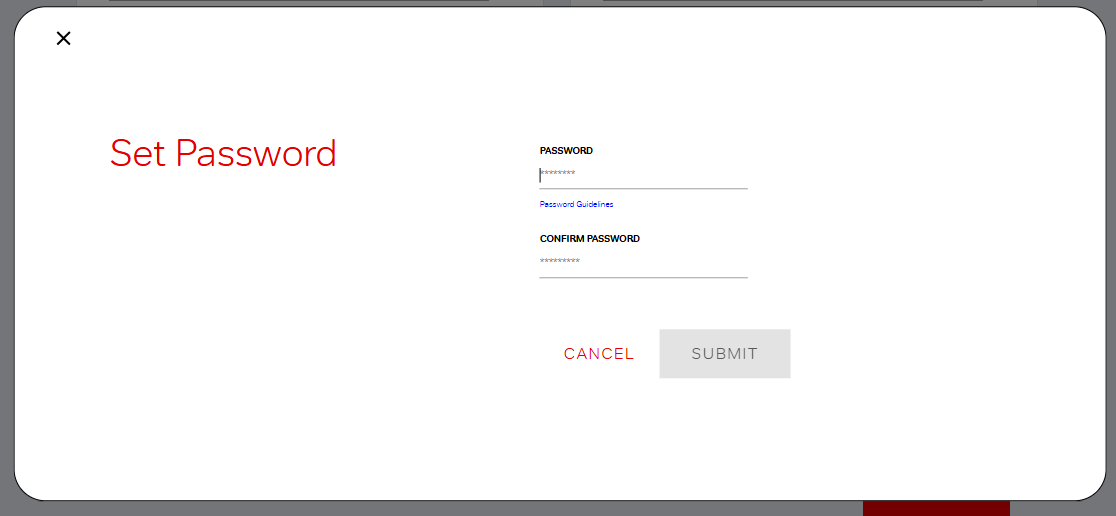
Next, enter your password and click on Submit.
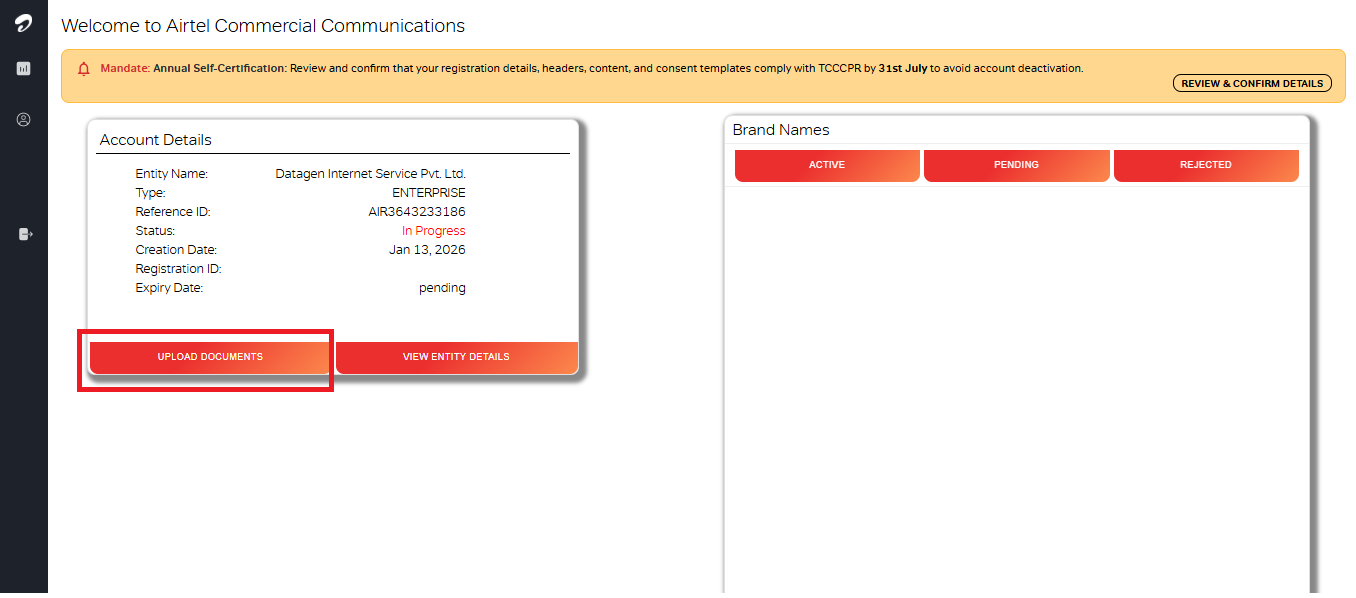
After logging in to your Airtel DLT account, access the dashboard and select “Upload Documents” to upload the required KYC and business verification files.
Click on the Select option and choose the appropriate file to upload the soft copy of your documents.
Upload the following documents as required:
- Proof of Identity
- Authorization Letter
- Proof of Address
- PAN Card
- GST Certificate / GST Declaration
- Other Supporting Documents (if applicable)
After uploading all documents:
- Enable the toggle button to confirm the submission
- Click on the Submit button to complete the document upload process
Make sure all documents are clear and valid to avoid approval delays.
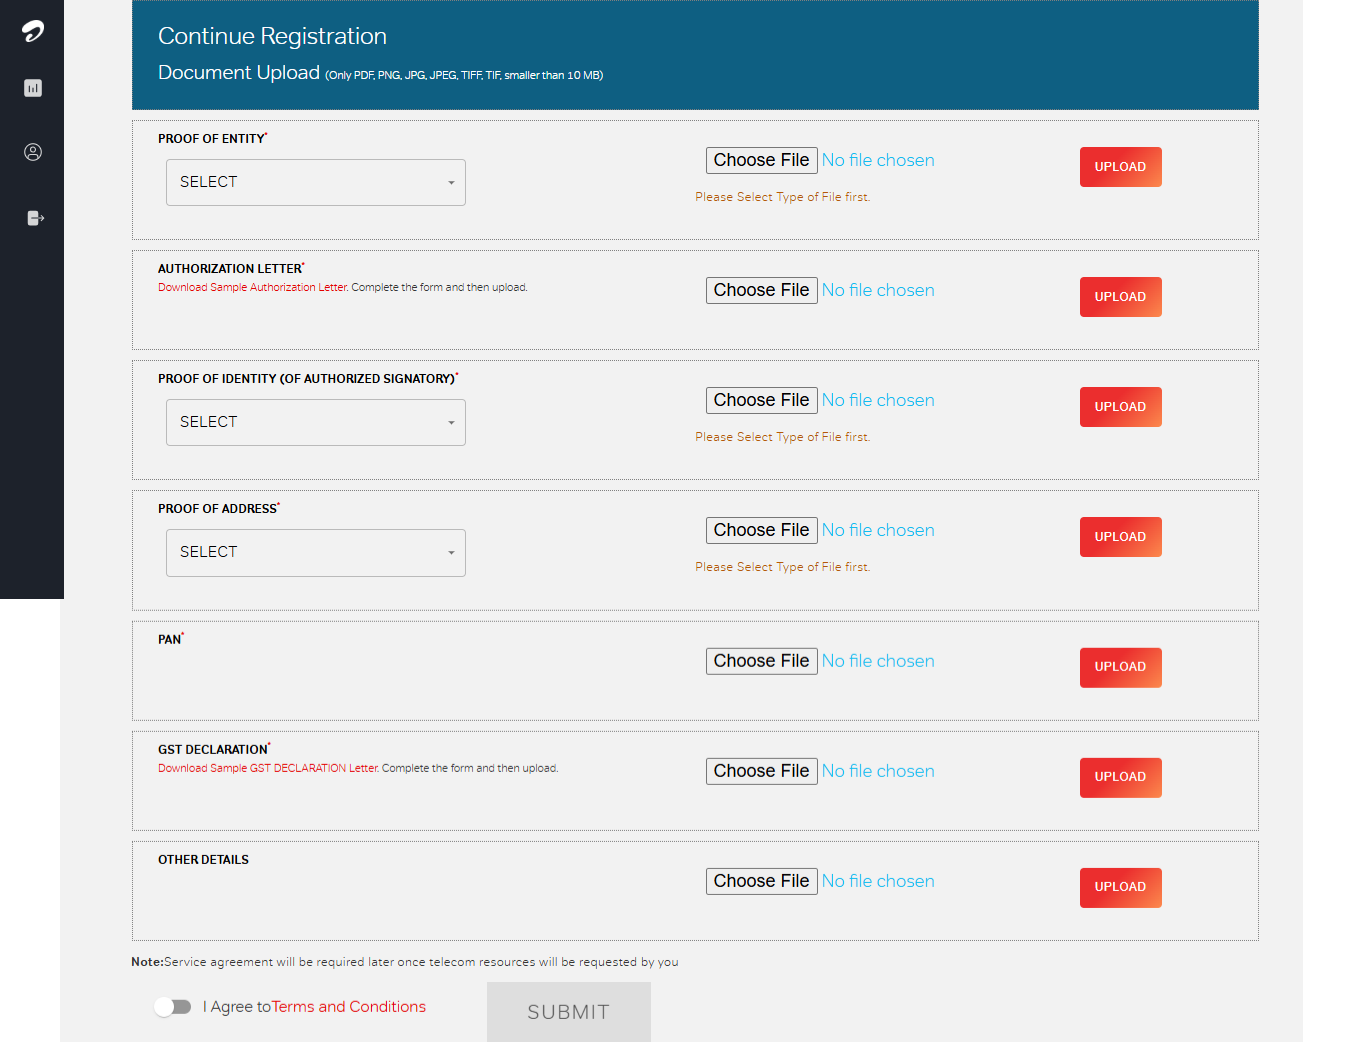
After submitting all the documents click on the Submit button.
KYC Verification
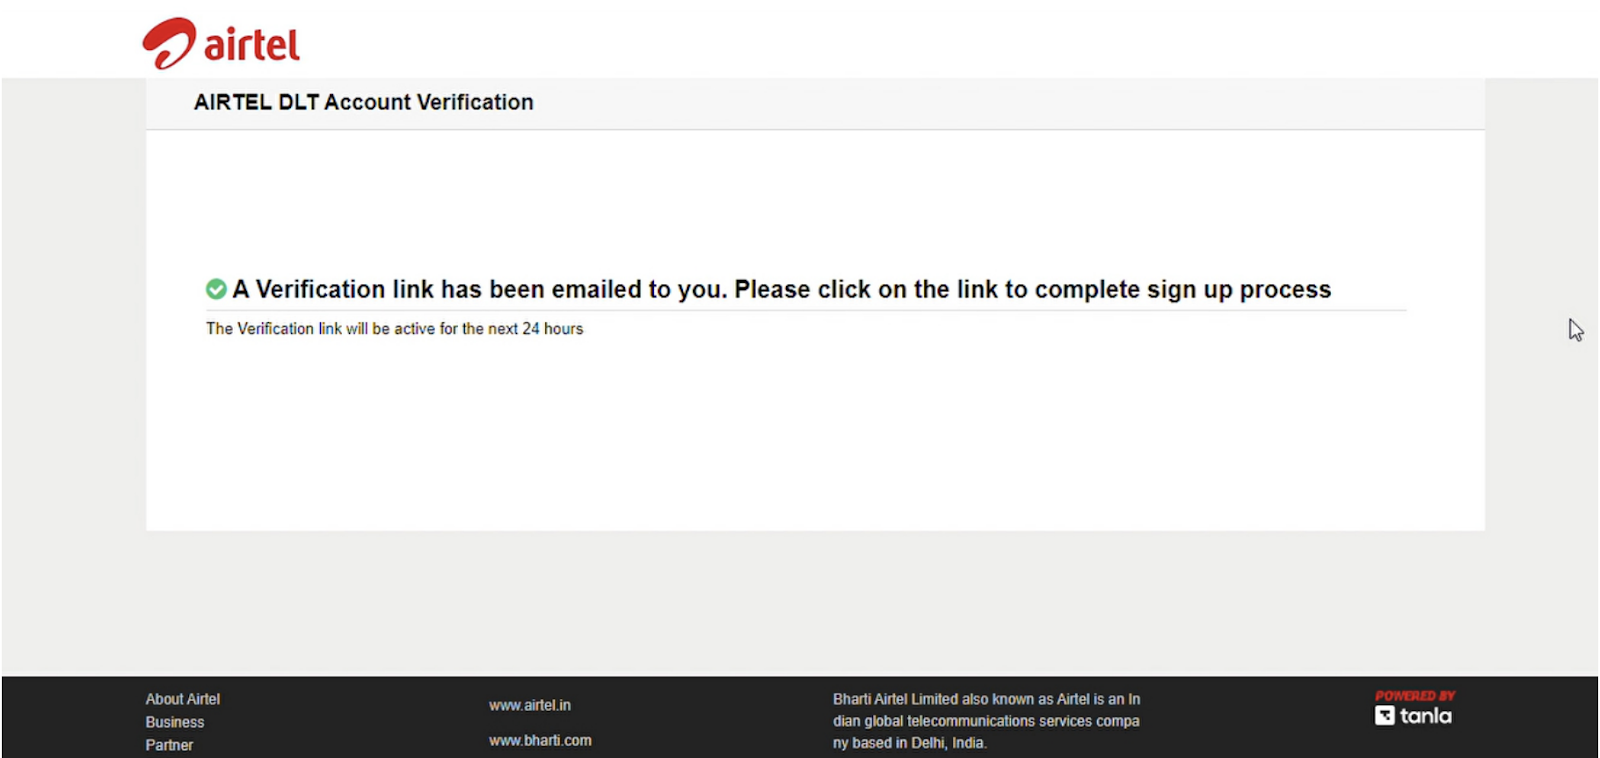
After submission, you will receive an email for KYC verification.
Open the email and click on the verification link to confirm your details.
Payment Process
Once KYC verification is completed, you will receive a payment email from Airtel.
Click on the payment link and complete the payment (approximately ₹5,900).
Entity Activation
After successful payment:
- Your Entity registration will be completed
- The Entity ID usually becomes active within 24 hours
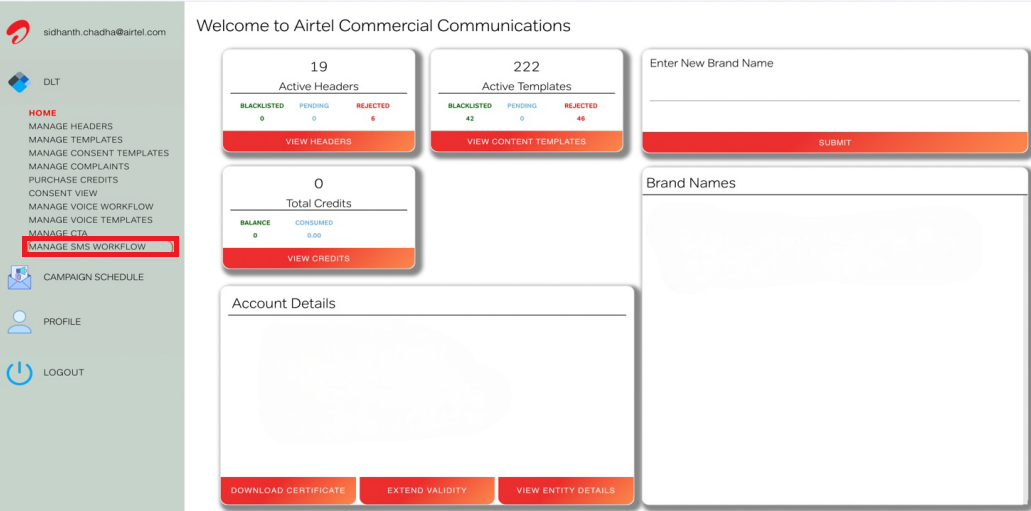
This completes the Principal Entity registration process on the Airtel DLT portal.
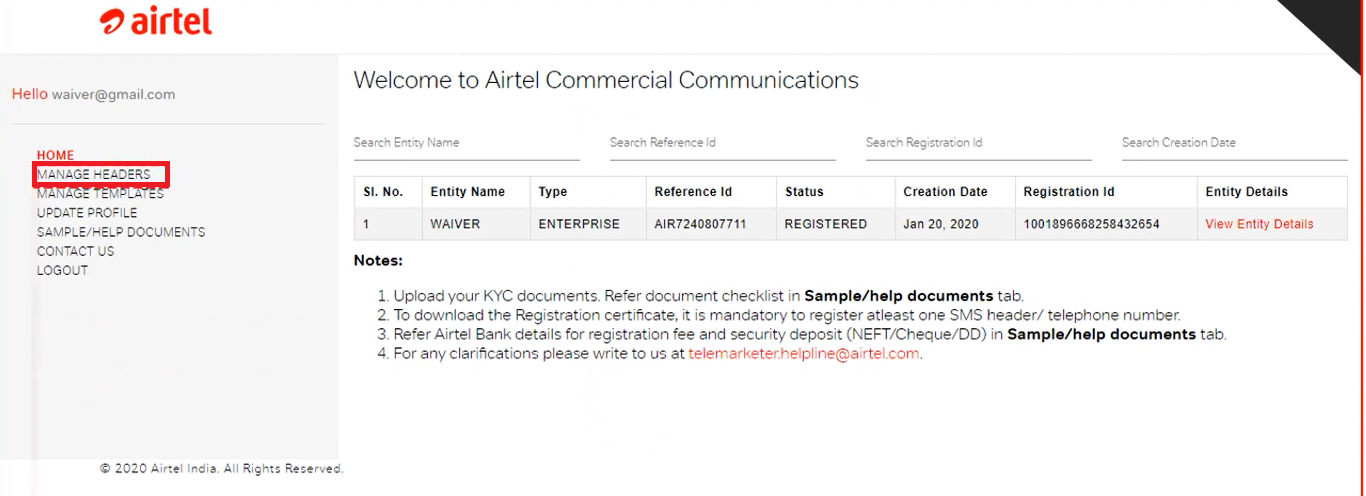
Step 2: Header (Sender ID) Registration
Once your Entity is active, the next step is to add and approve your Sender ID (Header) on the Airtel DLT portal.
It is a unique, fixed-length alphanumeric code that identifies the sender of a commercial SMS.
Let’s move ahead with the steps for Header registration on Airtel DLT.
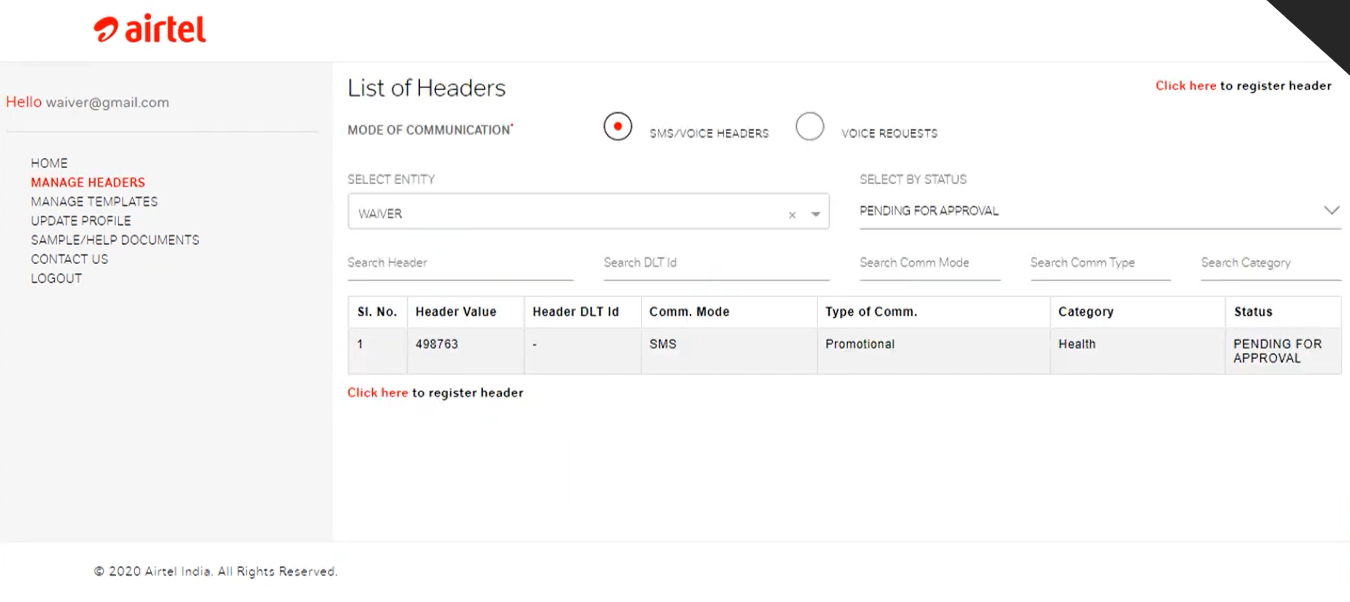
Click on the Manage Header in the left sidebar.
Click on the “Click here to register header” in the top right corner.
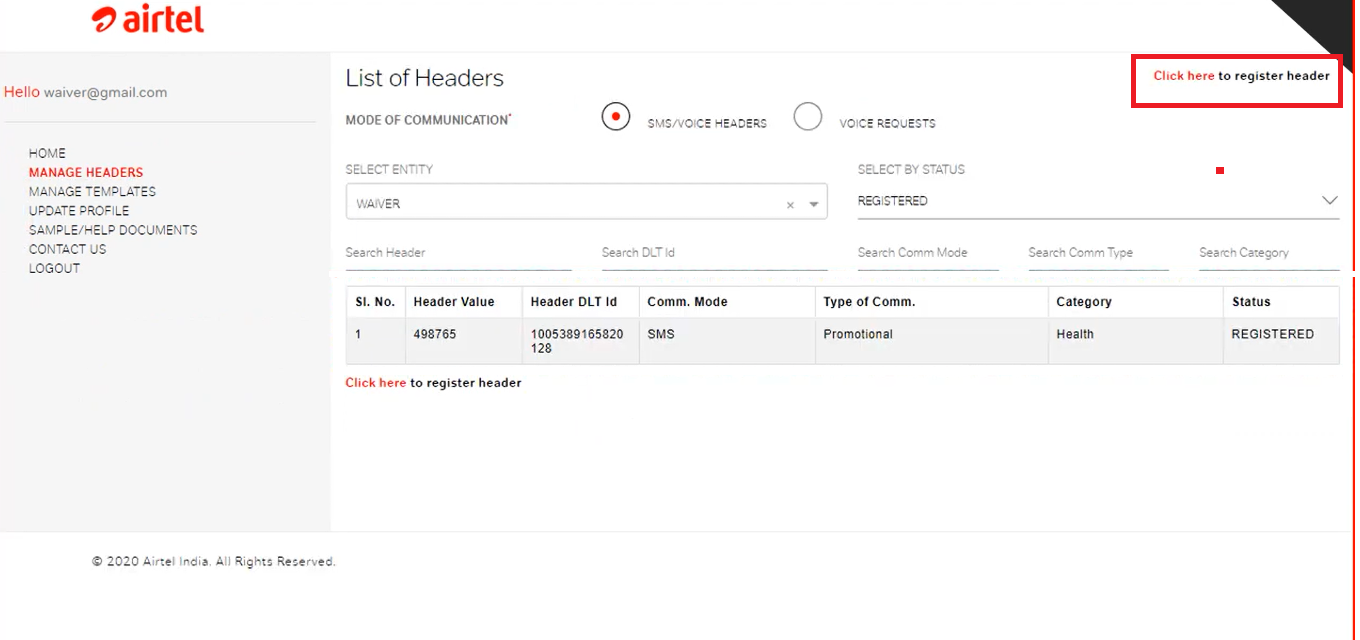
Select Entity from the dropdown list.
Choose Mode of Communication as SMS
Select How to Manage as Manual
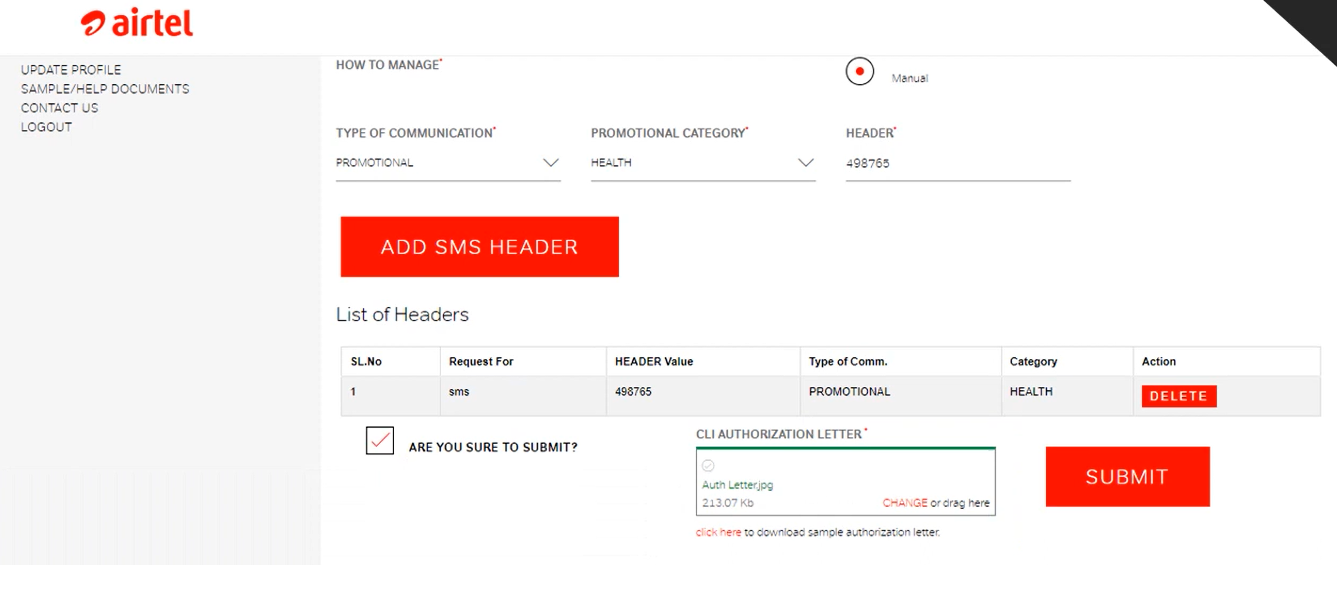
Next, choose the Type of Communication based on the kind of messages you plan to send: Promotional, Transactional and Service.
Select the appropriate business category that best describes your industry
Enter the Header (Sender ID) as a numeric sender ID for promotional messages (6-digit numeric in India for promos).
Click on the Add SMS Header Button.

Tick the checkbox labeled “Are You Sure to Submit?” to confirm your submission.
Next, upload the CLI Authorization Letter.
Once done, click on the Submit button to complete the header registration process.
This is the successful submission of Header.
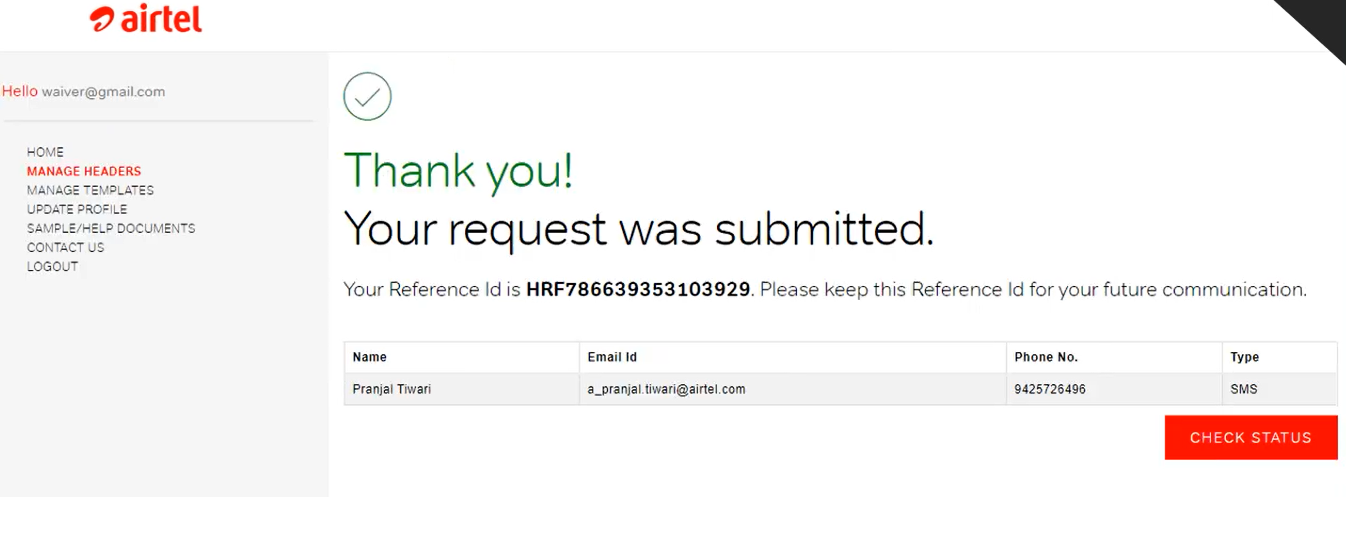
After submission, you can track the status of your Header approval directly from the dashboard.
In most cases, the Header is approved within 1 hour, but it may take up to 24 hours depending on verification.
The next step is to approve the message content.
Step 3: Content Template Registration
SMS Content Template Registration is a mandatory step in the DLT process where businesses submit their SMS message formats for approval as per TRAI regulations.
Every promotional, transactional, service, or OTP message must be registered on the DLT portal before it can be sent to customers.
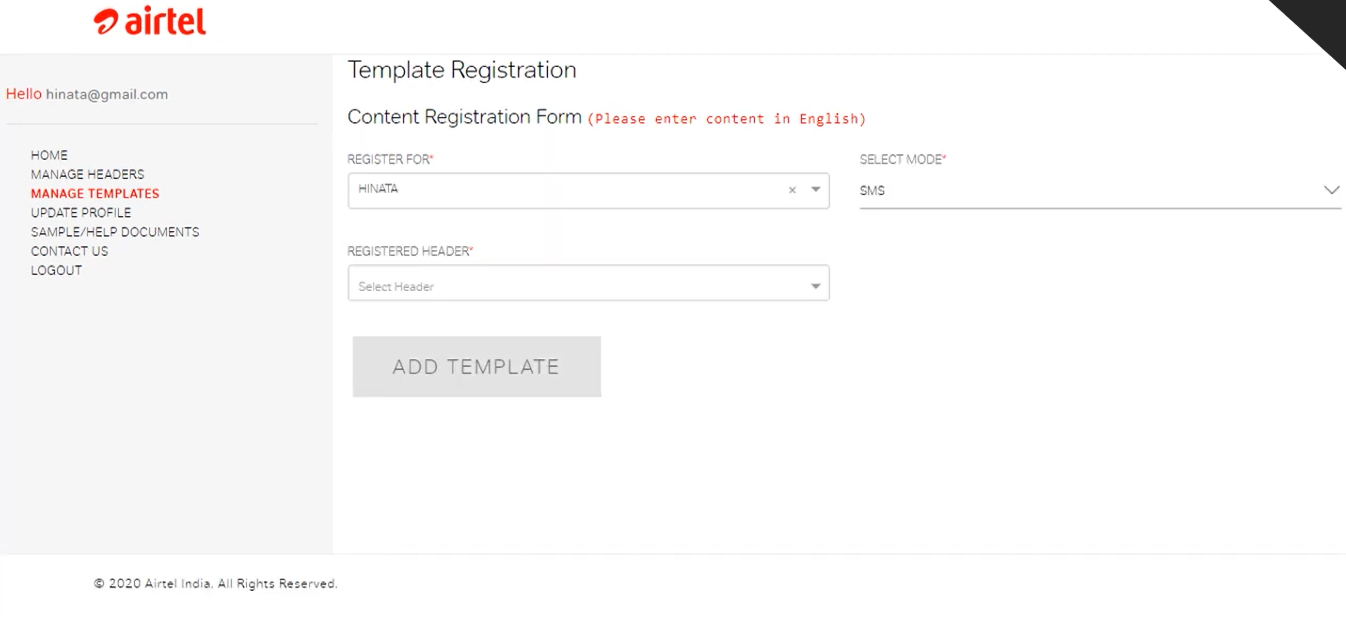
Click on the Manage Template in the left sidebar.
Click on the “Click here to register template”.

Next, select your Entity from the dropdown list.
Choose Mode of Communication as SMS.
Select the approved (registered) Header / Sender ID from the dropdown.
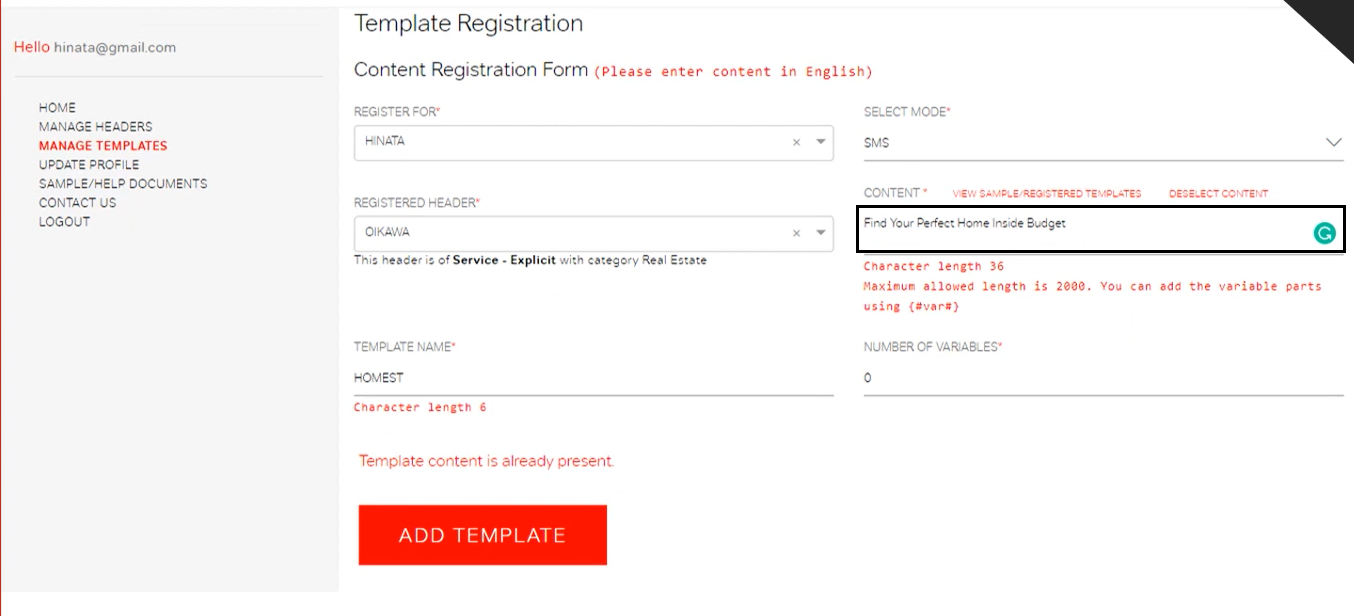
Paste your message content into the black highlighted text field.
Assign a template name so it can be easily identified and managed later.
Once done, click on Add Template to submit the SMS content for approval.
Tick the “Are you sure to submit?” checkbox to confirm your submission.
Then, click the Submit button to complete the process.
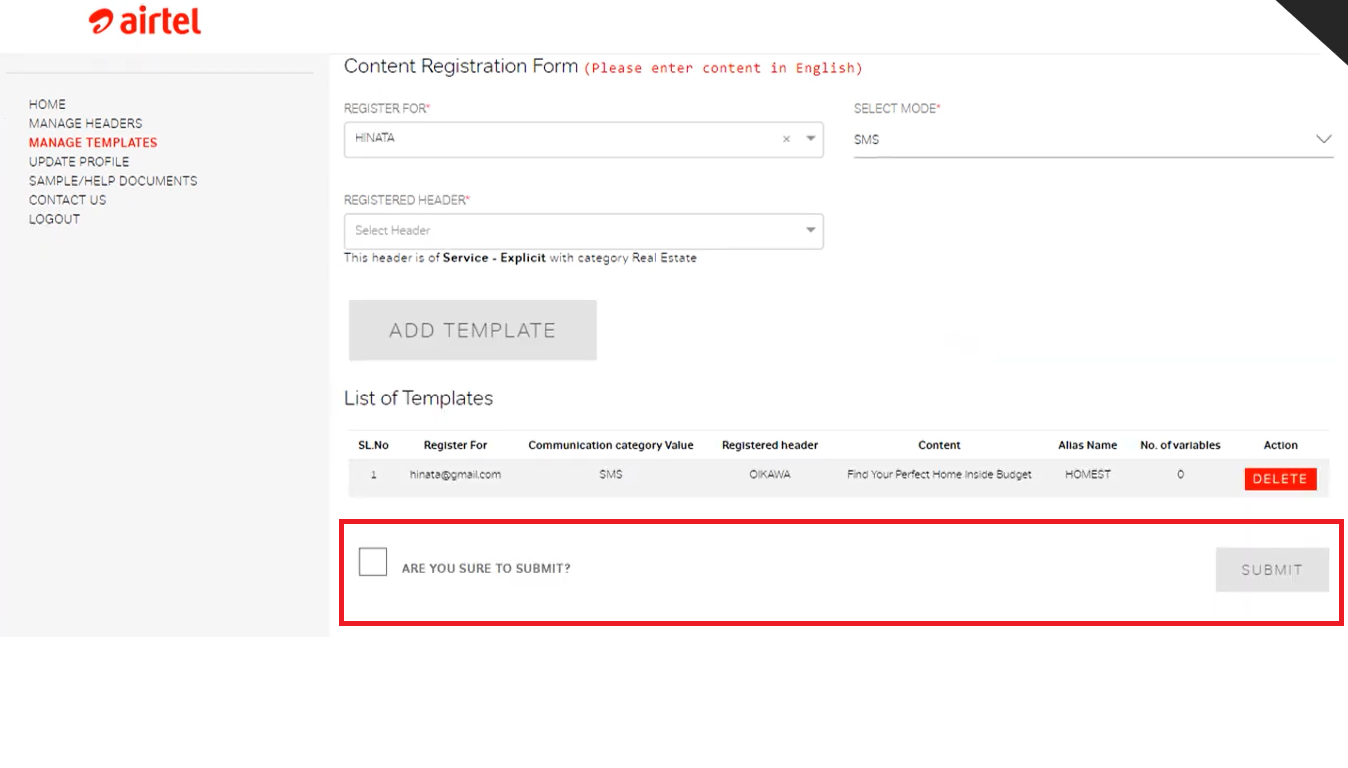
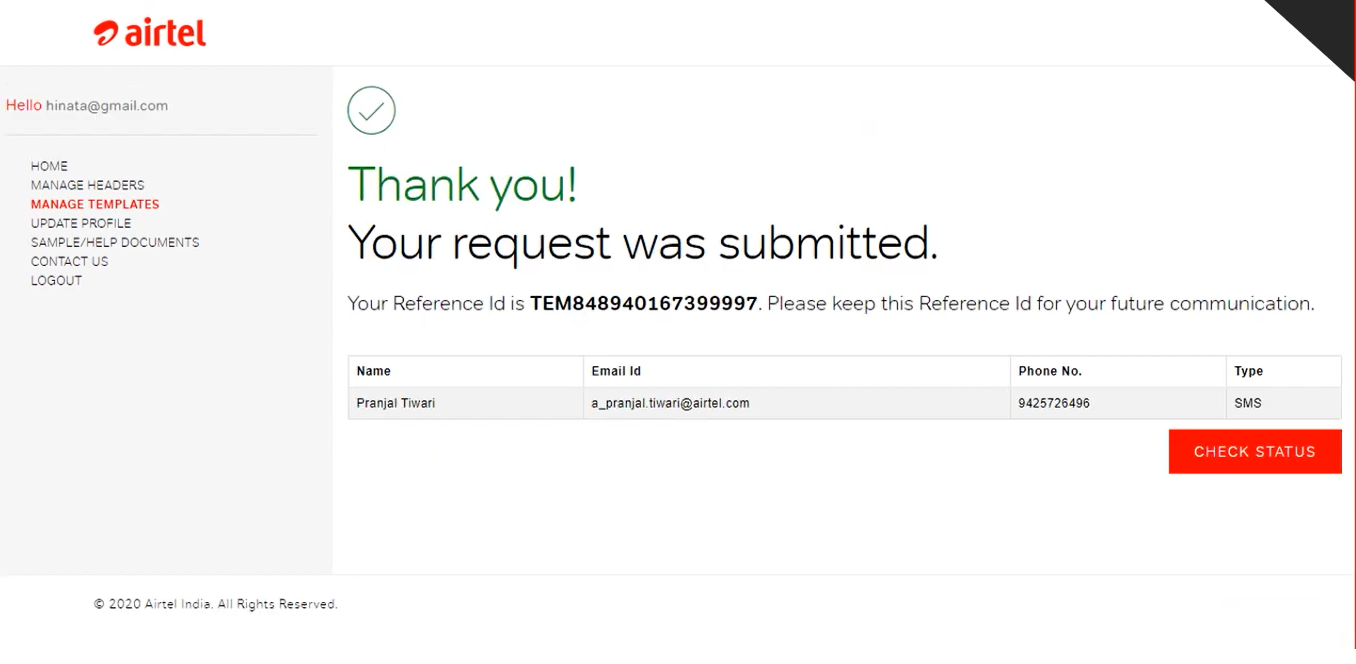
The message content template has been successfully submitted.
You can track its approval status from the dashboard.
In most cases, the template gets approved within 10–15 minutes.
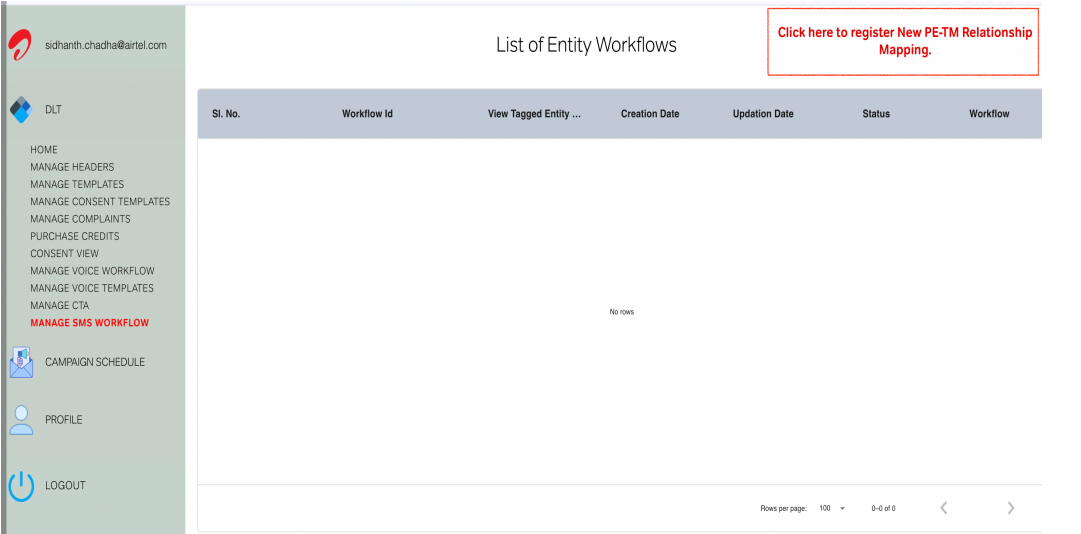
Step 4: Add PE-TM Chain Binding
PE-TM Chain Binding refers to the linking of the principal entity (of customer DLT portal) with its Telemarketer on the DLT platform. It creates an easy to trace and verify message flow to ensure accountability and prevent spam messaging.
Click on “Manage SMS Workflow.”
Click “Register New PE–TM Mapping” from the top-right corner.
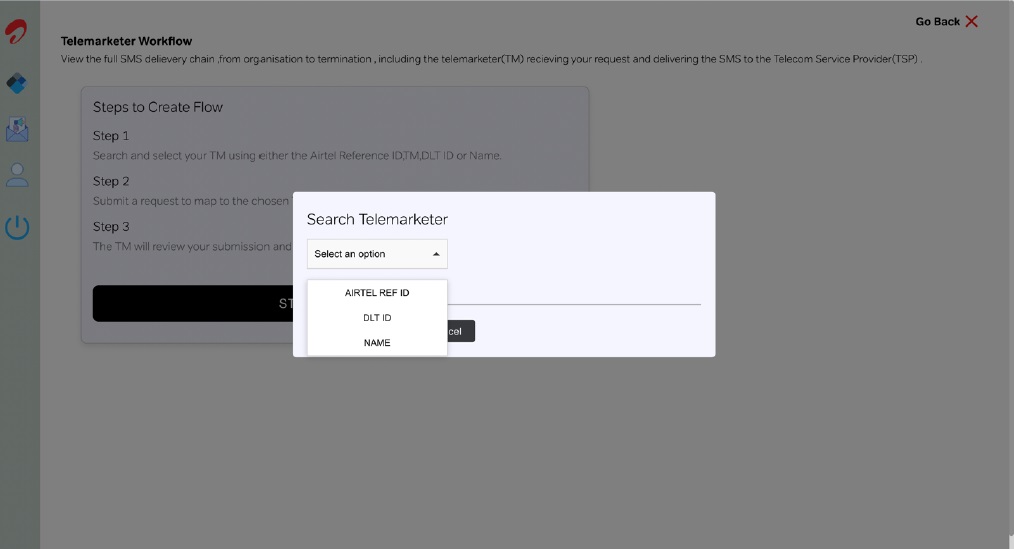
Start the mapping process. Click the “Start Creating” button.
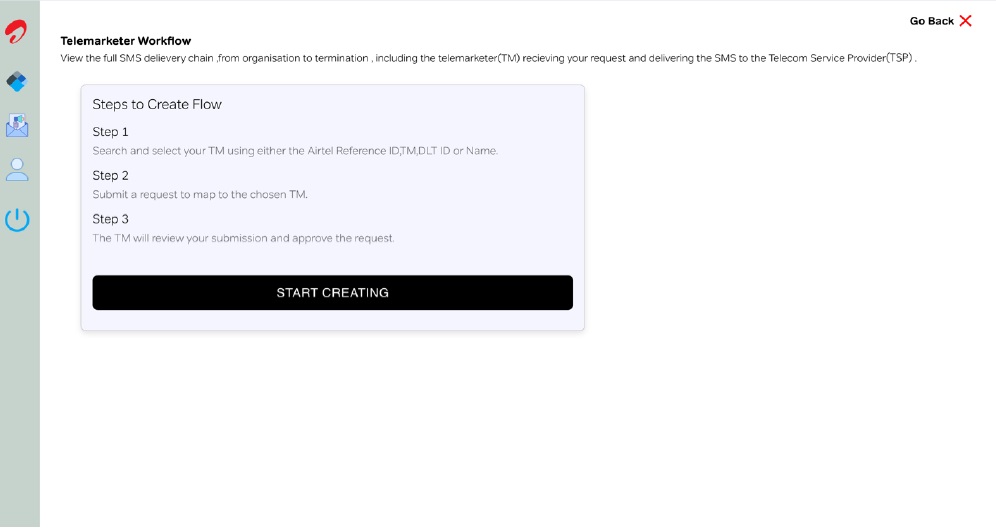
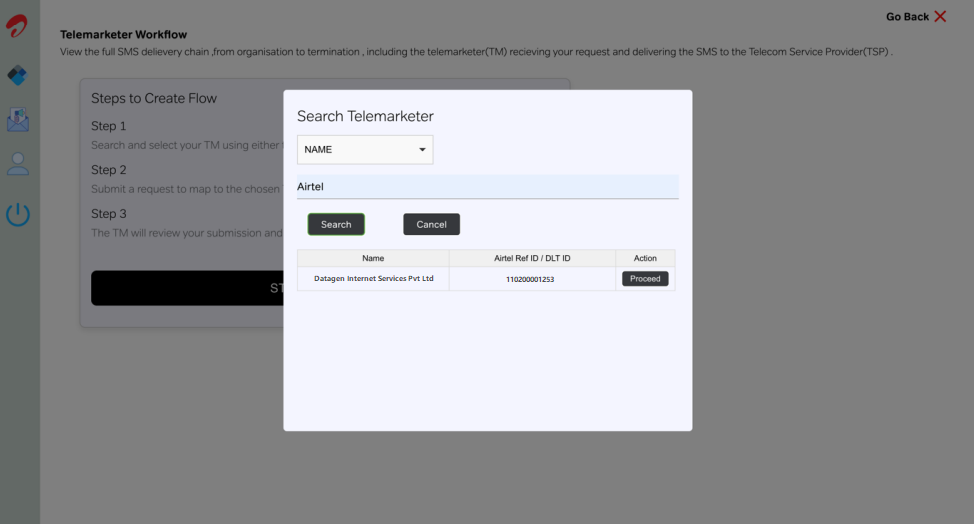
Search for your Telemarketer. Search using Name, Ref ID, or DLT ID.
Recommended: Search by Name. Authkey operates under Datagen Internet Services Pvt. Ltd.
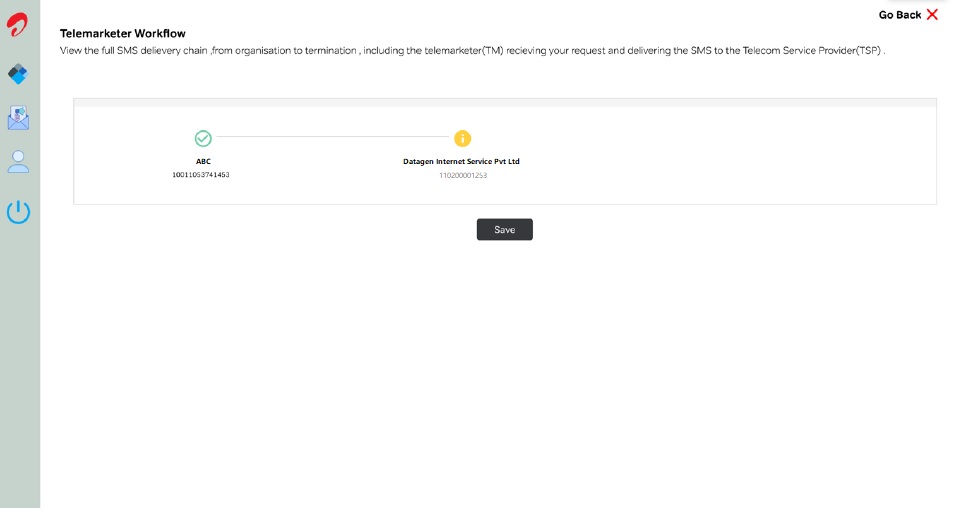
Choose the correct Telemarketer from the list and click Proceed.
Click Save to complete the flow. The approval request will be automatically sent to the Telemarketer(Authkey).
Click “View Workflow” to check the current status of your PE–TM chain request.
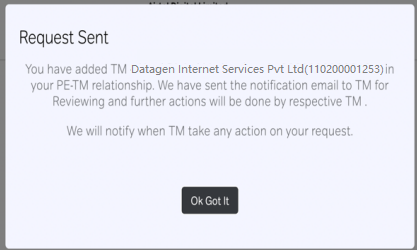
After submitting the request, contact Authkey support to approve the request from the Telemarketer portal.
 56
56
 3
3