How Add a WhatsApp Chat Widget (button) to Your Wix Website?
Add A WhatsApp Chat Button To Your Wix Website
In this guide, you’ll learn step by step how to integrate the Authkey WhatsApp Chat Widget into your Wix website.
Prerequisites
Before you begin, please ensure you have the following:
- Authkey Account
Create your free account at Authkey Signup. - WhatsApp Business API
The Authkey WhatsApp Chat Widget works only on the official WhatsApp Business API.
- If you’re already onboarded, proceed to the next step.
- If not, start your WhatsApp Business API onboarding process.
- A Website
You need access to your website’s code where the widget code will be placed.
Step-by-Step Guide
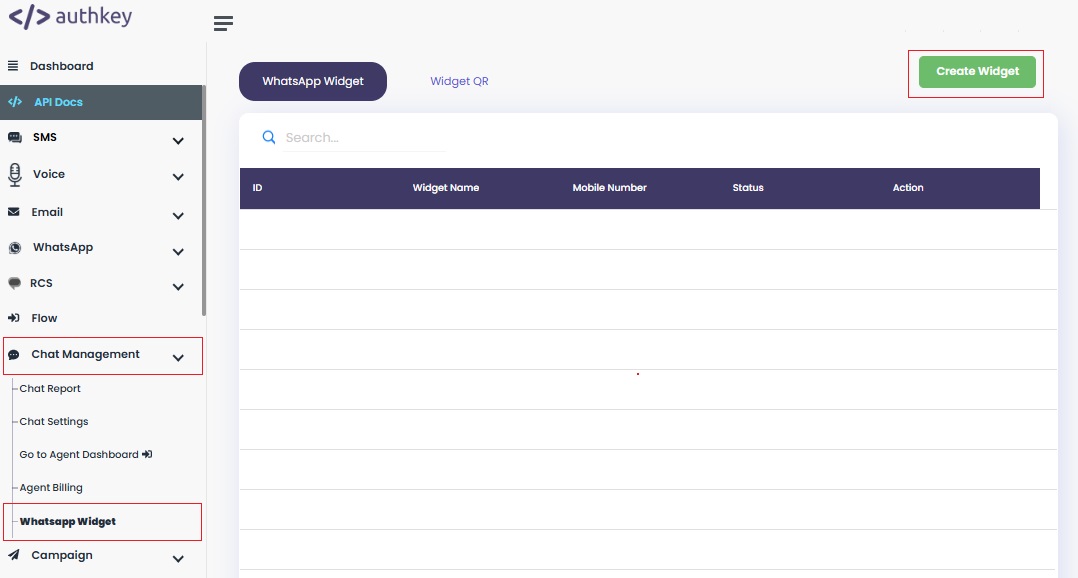
1. Sign in to Your Authkey Account
- Go to your dashboard.
- Navigate to: Chat Management → WhatsApp Widget → Create Widget.
2. Customize Your Widget
To make your WhatsApp Chat Widget match your brand, fill in the following fields:
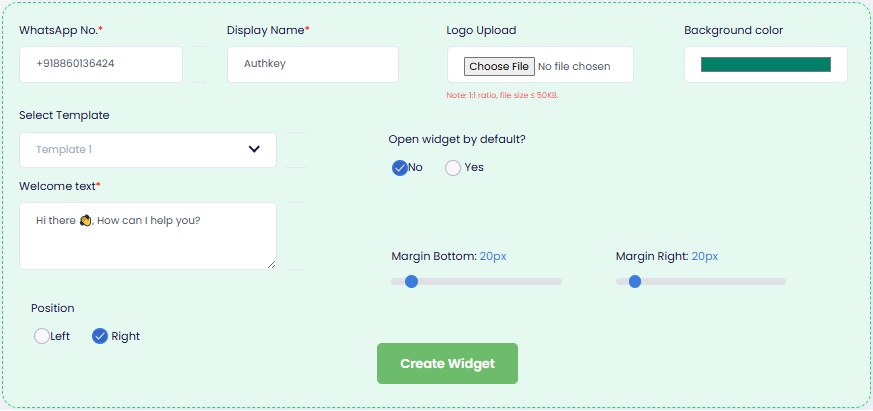
- WhatsApp Number
Enter the registered WhatsApp Business API number. - Display Name
Add your business name (e.g., Authkey Support or XYZ Store). This will be shown to users on the widget. - Logo Upload
Upload your company logo to make the widget look authentic and branded. - Background Color
Select a color that matches your website’s theme or brand identity. - Select Template
Choose a predefined widget style or template for a ready-made layout. - Open Widget by Default?: Yes or No
Decide whether the widget should be open automatically when someone visits your website. - Welcome Text
Add a friendly greeting or call-to-action (e.g., “Hi Need help? Chat with us on WhatsApp!”). - Position
Select where the widget will appear on your website: bottom right or bottom left. - Margin Bottom / Right
Adjust the spacing from the screen edge to fit well with your site’s layout.
Once all fields are filled, click “Create Widget” to generate the Code.
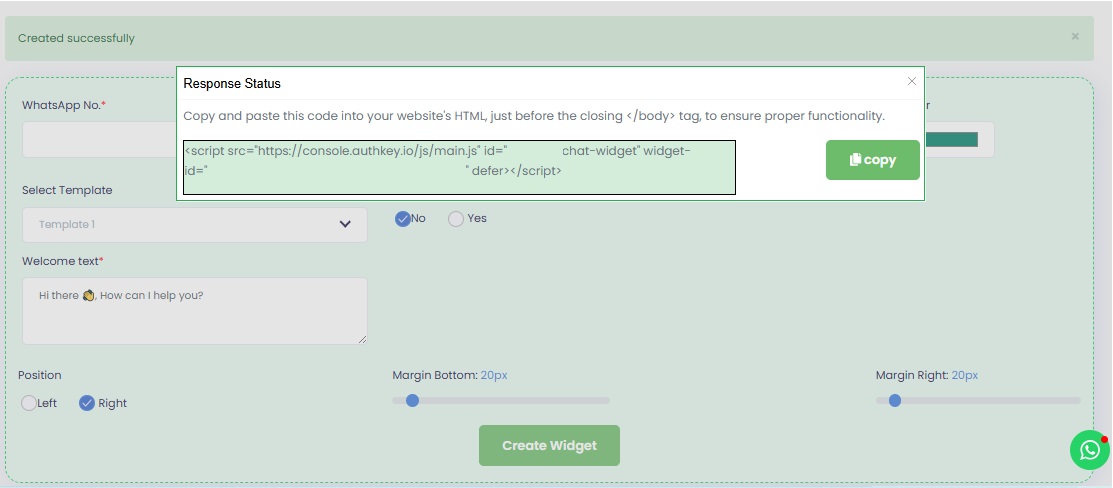
3. Embed the Widget Code on Wix Website.
Copy the Generated Code by clicking on the “copy” button.
Add Code to Wix
Log in to your Wix account and go to your website editor.
On the left menu, click Settings → Custom Code.
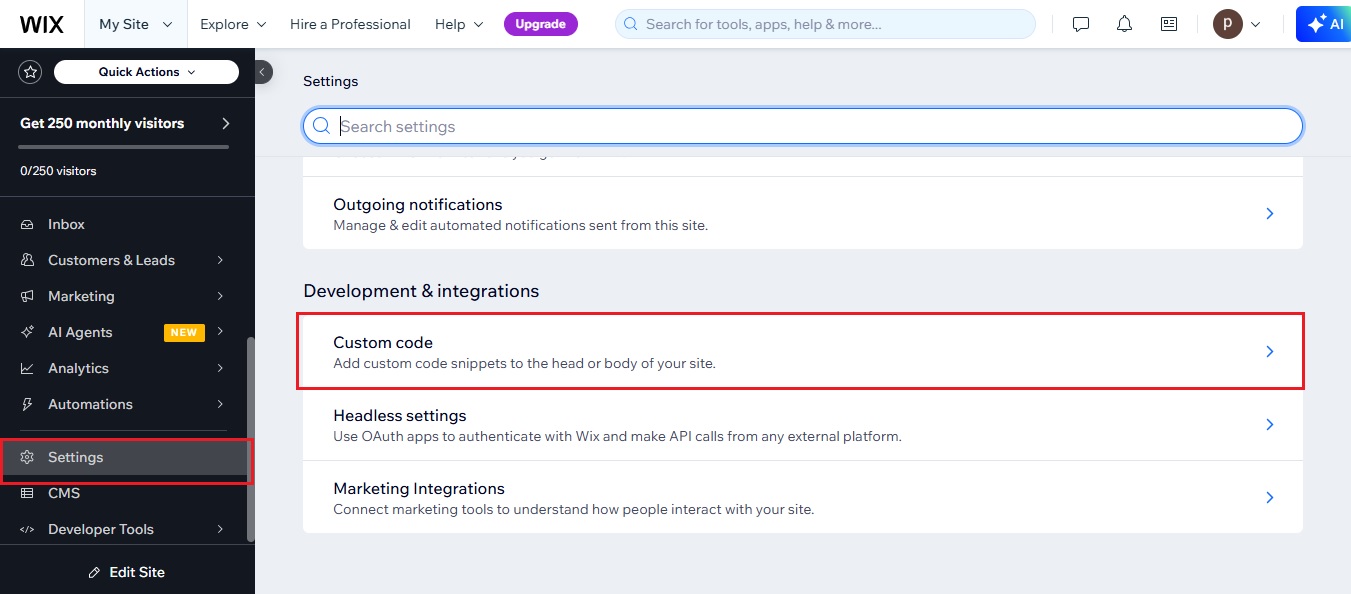
Then, Click + Add Custom Code.
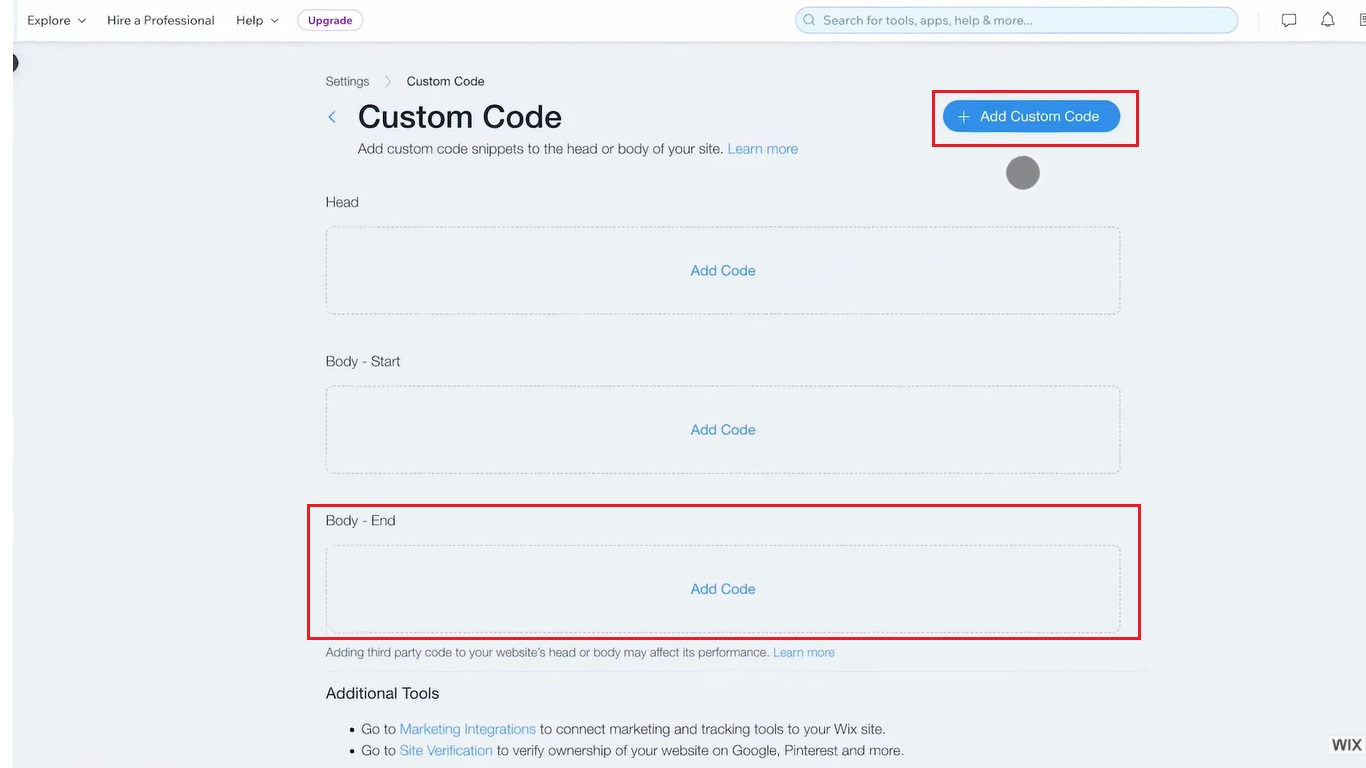
Paste the WhatsApp Widget code into the code box.
Under Place Code In, select Body – end (so it loads before the closing </body> tag).
Apply the code to all pages (recommended) or just specific pages.
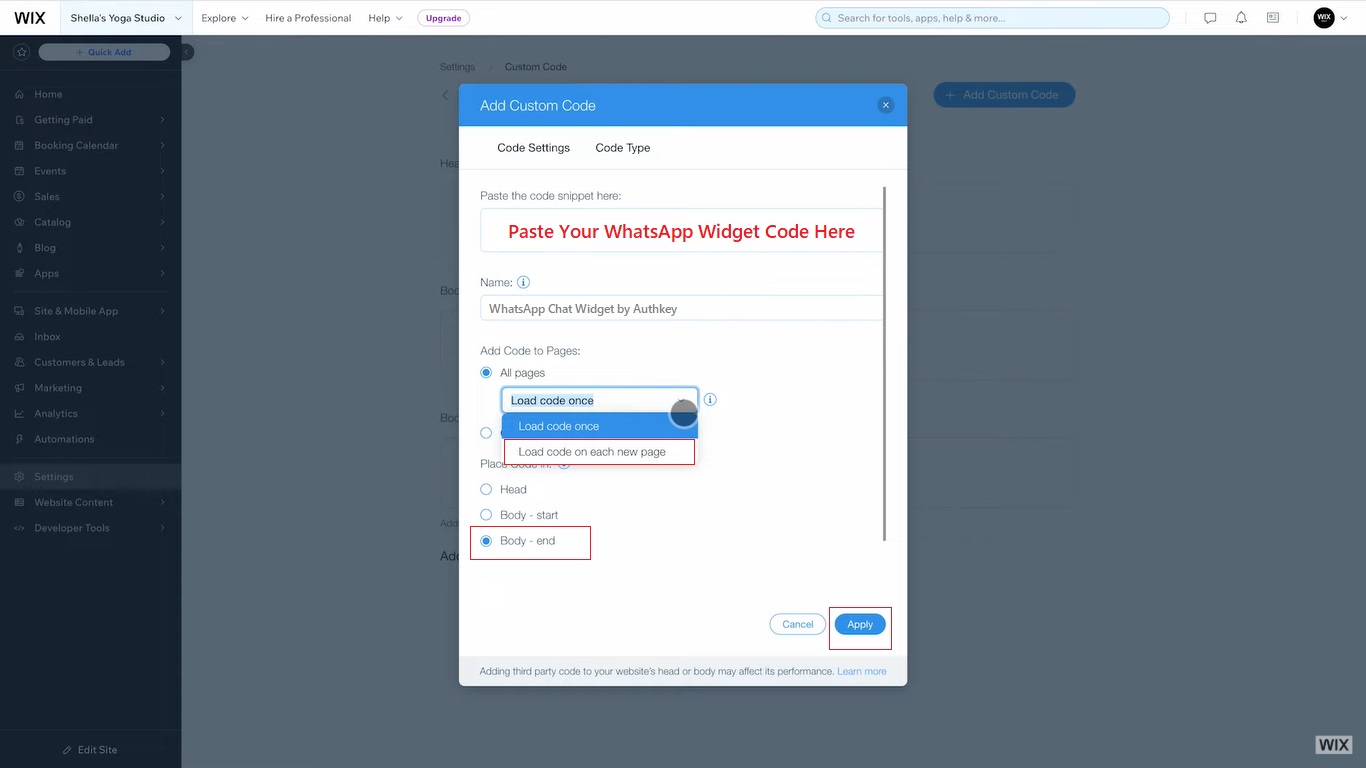
Click Apply.
Publish Your WebsiteSave & publish changes.
Refresh your live Wix website → The WhatsApp Chat Widget will now appear in the bottom corner.

Done! Your Wix site now has a live WhatsApp Chat Button connected via Authkey.
 2
2
