How to Submit and Get Approval for an RCS Message Template?
Create RCS Message Templates Easily – Text, Carousel, Rich Cards
Once you complete the RCS Onboarding process, your account becomes eligible to create and submit message templates for approval.
Note: If you haven’t completed the onboarding process yet, click here to start the RCS onboarding process.
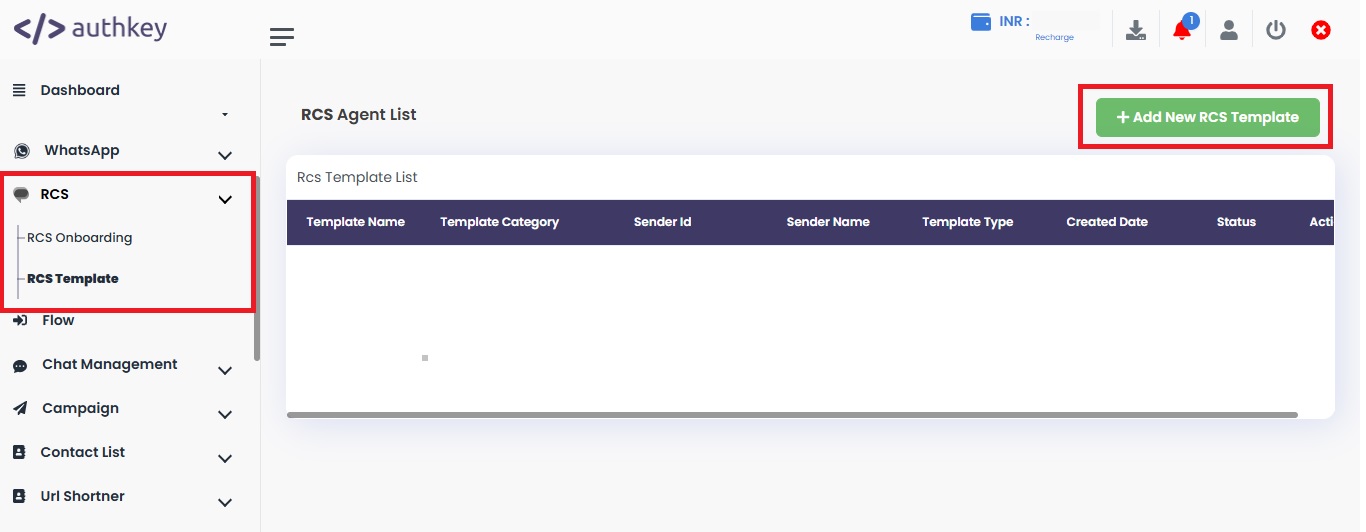
Step 1: Access the RCS Template Section
- Log in to your Authkey Dashboard.
- Go to RCS → RCS Template → + Add New RCS Template
This will open the RCS Template Message window.
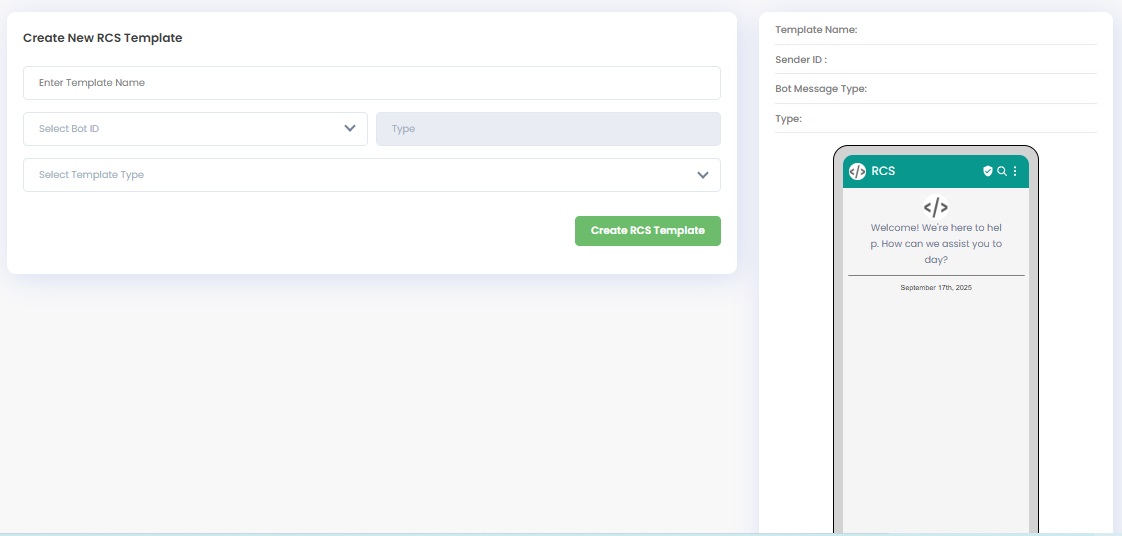
RCS templates are available in three types. Select the one that fits your use case:
- Simple Text – For plain text messages (can include variables and action buttons)
- Rich Card Carousel – For multiple cards displayed in a horizontal carousel
- Rich Card Standalone – For a single card with media and text
Let’s learn one by one.
Type 1: RCS Message Template Type: Simple Text
After completing Step 1, follow these steps to create a simple text RCS message template:
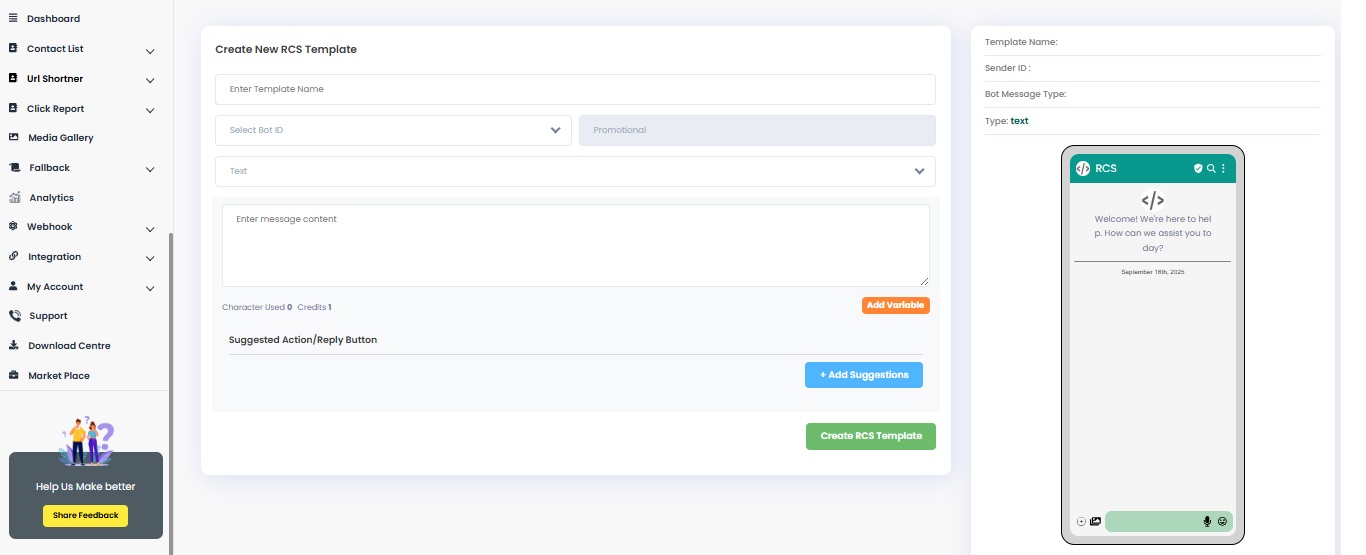
Enter the Template name: Provide a unique name for the template. This helps you easily identify it later when you want to use it in campaigns.
Select Bot ID: Choose the Bot ID (Agent) based on the type of message you are sending:
- Promotional – for offers, marketing messages
- Transactional – for notifications, confirmations
- OTP – for one-time password verification messages
Select Template Type: Select “Text” as the template type to create a simple RCS text message.
Enter Message Content: Type your message in the provided text box.
You can include variables (e.g., name, date, number) to personalize the message dynamically.
Suggested Action/Reply Button: Click on the “+Add Suggestions” to add the action button at the end of the message text.
Reply Button

- Click “+ Add Suggestions” → Select Reply
- Fill Suggestion Text (button label) and Suggestion Postback (response value)
URL Action
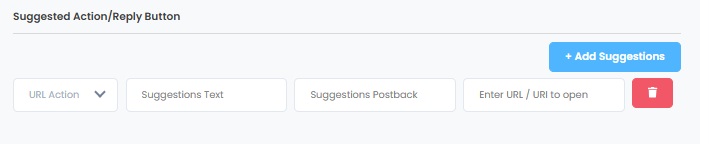
- Select URL Action
- Fill Suggestion Text and Suggestion Postback
- Paste the target URL in the Enter URL field
Dialer Action
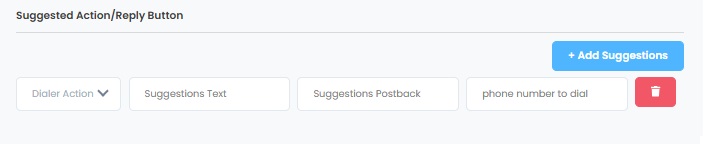
- Select Dialer Action
- Fill Suggestion Text and Suggestion Postback
- Enter the phone number in the Phone Number field
Review and Submit
- Your RCS message template can include multiple variables and action buttons.
- The preview panel on the right shows how the message will look (visual reference only; final design may slightly differ after approval).
- Click Create RCS Template to submit.
The template status will show as Pending. It usually takes 10–15 minutes for automatic approval, after which the status will change to Approved.
Type 2: RCS Message Template Type: Rich Card Carousel
After completing Step 1, follow these steps to create a Rich Card Carousel Message Template:
Enter the Template name: Provide a unique name for the template. This helps you easily identify it later when you want to use it in campaigns.
Select Bot ID: Choose the Bot ID (Agent)
- Promotional – for offers, marketing messages
Select Template Type: Select “Rich Card Carousel”.
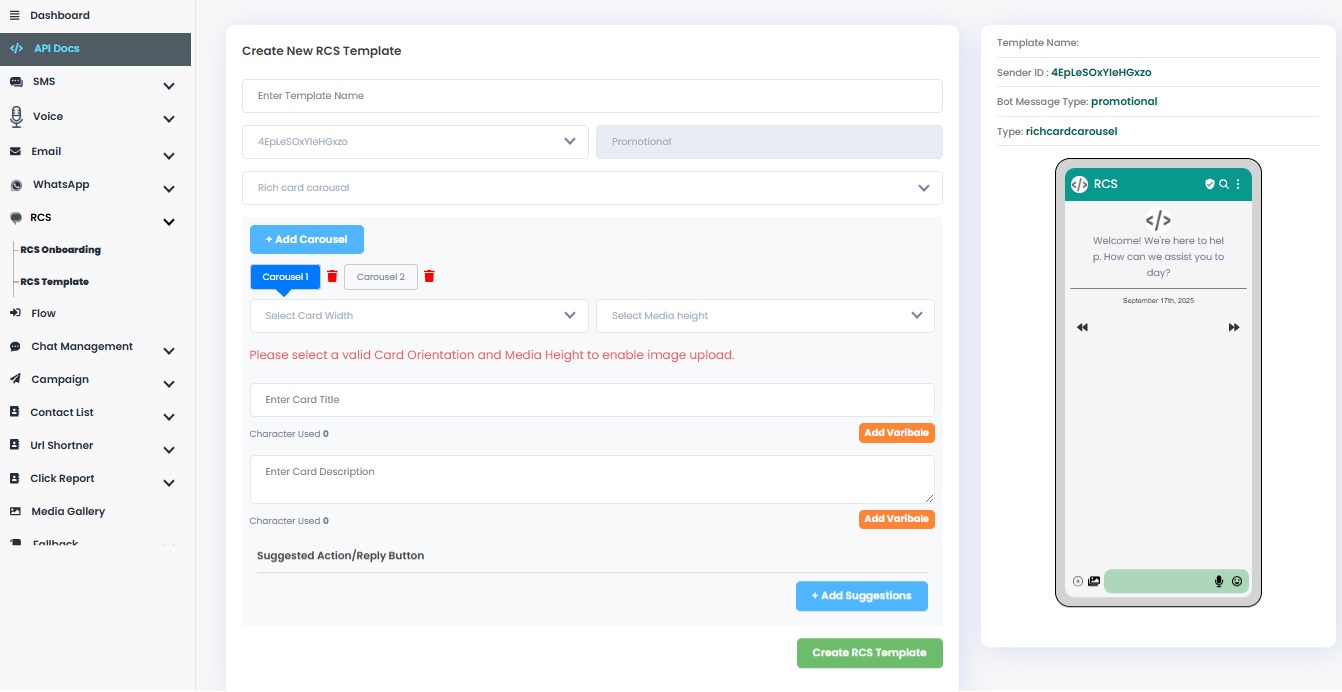
+ Add Carousel: Click on + Add Carousel to add the number of cards you want to display.
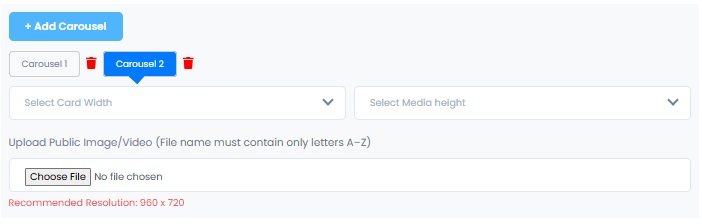
Select Image Size: Choose the width and height of your carousel images — either Small or Medium, depending on your design requirements.
Upload Image: Click Choose File to upload an image for the card. You can crop and adjust the image before saving.
Enter Card Title: Add a headline or short title for each card (e.g., product name, offer title).
Enter Card Description: Provide a short description or message for the card in the text box.
Tip: You can include variables (e.g., name, date, number) to personalize the message dynamically.
Suggested Action/Reply Button: Click on the “+Add Suggestions” to add the action button at the end of the message text.
Reply Button
- Click “+ Add Suggestions” → Select Reply
- Fill Suggestion Text (button label) and Suggestion Postback (response value)
URL Action
- Select URL Action
- Fill Suggestion Text and Suggestion Postback
- Paste the target URL in the Enter URL field
Dialer Action
- Select Dialer Action
- Fill Suggestion Text and Suggestion Postback
- Enter the phone number in the Phone Number field
Do the same for every Carousel Card. Each Card will have its own message content and action buttons.
Review and Submit
- Your RCS message template can include multiple variables and multiple action buttons.
- The preview panel on the right shows how the message will look (visual reference only; final design may slightly differ after approval).
- Click Create RCS Template to submit.
The template status will show as Pending. It usually takes 10–15 minutes for automatic approval, after which the status will change to Approved.
Type 3: RCS Message Template Type: Rich Card Standalone
After completing Step 1, follow these steps to create a Rich Card Standalone Message Template. This is a single image marketing message through RCS.
Enter the Template name: Provide a unique name for the template. This helps you easily identify it later when you want to use it in campaigns.
Select Bot ID: Choose the Bot ID (Agent)
- Promotional – for offers, marketing messages
Select Template Type: Select “Rich Card Standalone”.
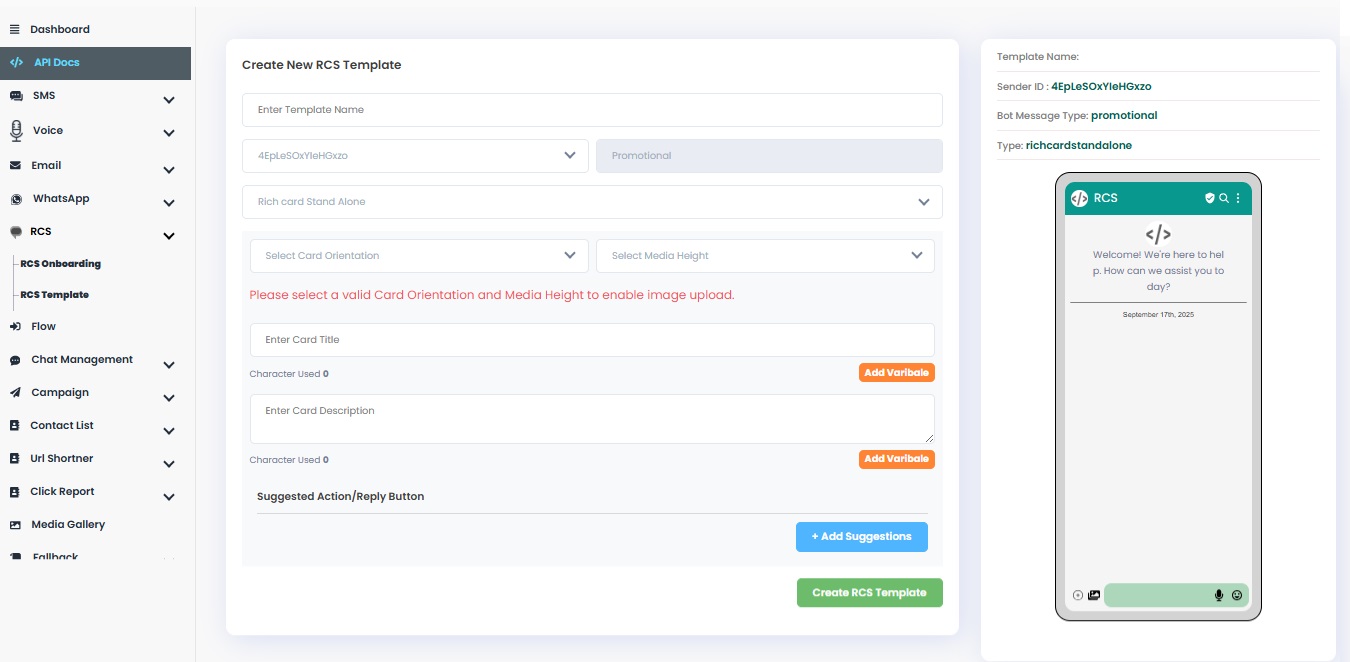
Upload Image
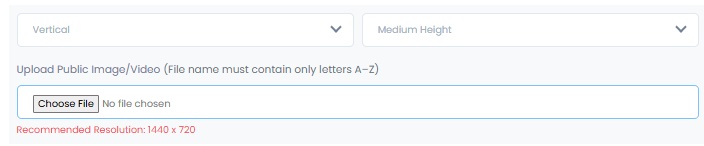
When creating a Rich Card Carousel or Standalone Card, follow these steps to upload your image:
- Select Card Orientation
Choose Horizontal or Vertical layout based on how you want the card to appear. - Select Media Height
Pick the desired image height — Short or Medium — to control the visual emphasis. - Choose and Upload Image
Click Choose File to select an image from your device. You can crop and adjust the image before uploading to ensure it fits perfectly.
Enter Card Title
Add a headline or short title for each card (e.g., product name, offer title).
Enter Card Description
Provide a short description or message for the card in the text box.
Tip: You can include variables (e.g., name, date, number) to personalize the message dynamically.
Suggested Action/Reply Button: Click on the “+Add Suggestions” to add the action button at the end of the message text.
Reply Button
- Click “+ Add Suggestions” → Select Reply
- Fill Suggestion Text (button label) and Suggestion Postback (response value)
URL Action
- Select URL Action
- Fill Suggestion Text and Suggestion Postback
- Paste the target URL in the Enter URL field
Dialer Action
- Select Dialer Action
- Fill Suggestion Text and Suggestion Postback
- Enter the phone number in the Phone Number field
Review and Submit
- Your RCS message template can include multiple variables and multiple action buttons.
- The preview panel on the right shows how the message will look (visual reference only; final design may slightly differ after approval).
- Click Create RCS Template to submit.
The template status will show as Pending.
It usually takes 10–15 minutes for automatic approval, after which the status will change to Approved.