Smartping DLT Registration (STPL Videocon)
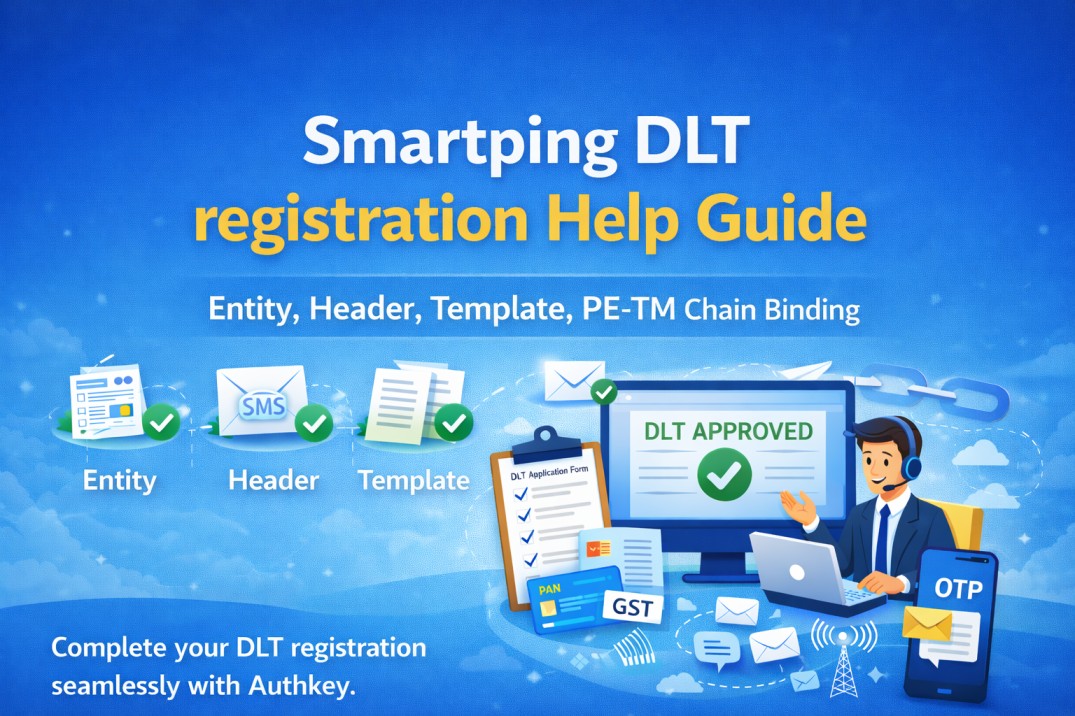
This guide explains how to complete DLT Entity Registration in India using the SmartPing (DLT) portal.
Authkey simplifies this entire process and supports you at every step.
Smartping DLT registration (step by step guide)
Step 1 : Entity Registration
Visit: https://smartping.live/entity/home
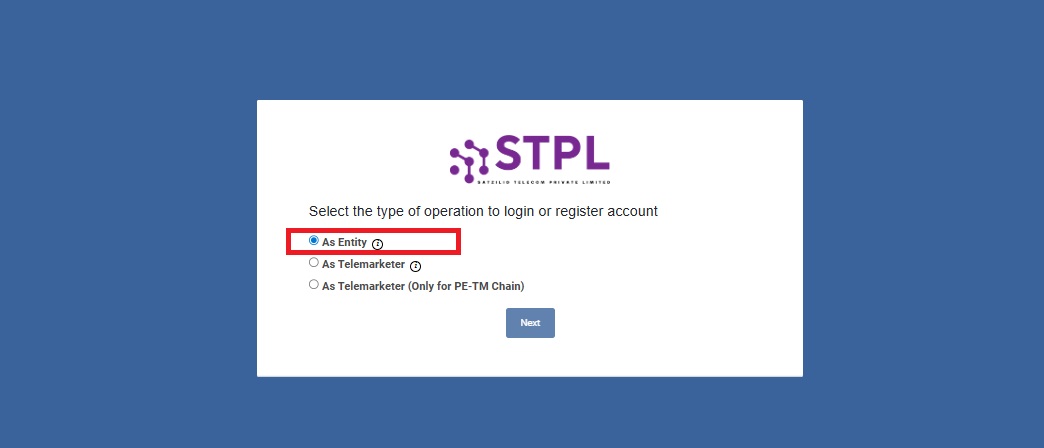
Click on the Login/Signup button.

Select “As Entity” and click on “Next”.
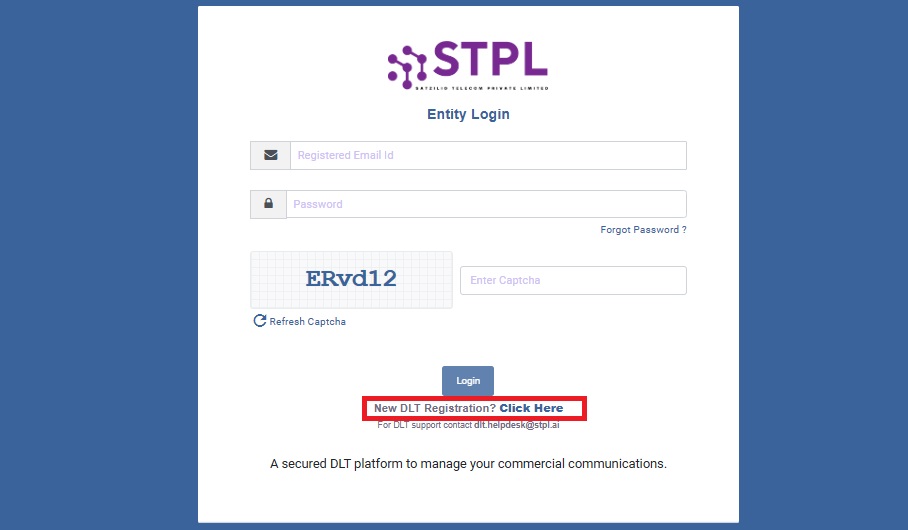
Click on the “New DLT Registration?”
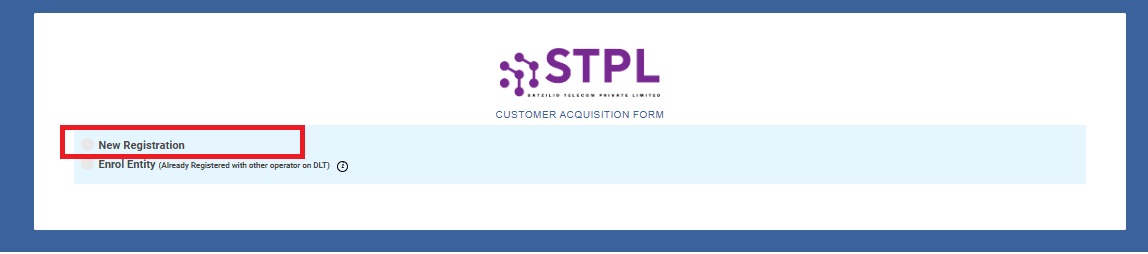
Select “New Registration”.
Fill all the business details as given below
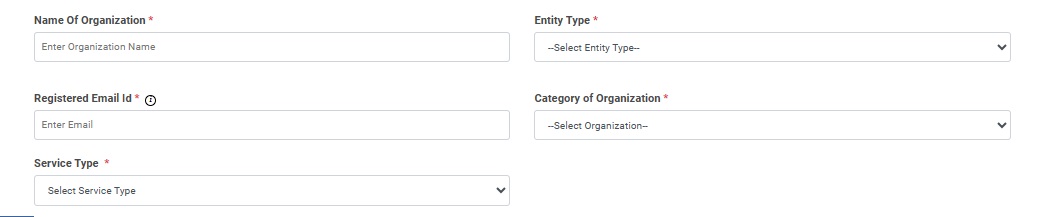
Organization Name: Enter your registered business name.
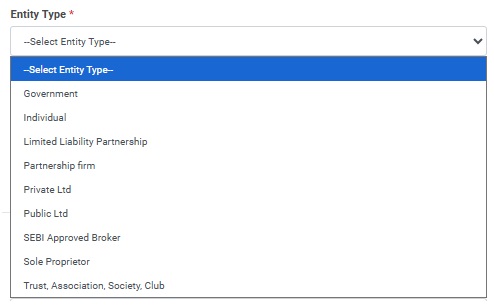
Entity Type: Select the entity type that best matches your business (Individual, Proprietorship, Private Limited, etc.).
Business Email Address: Provide an active email ID.
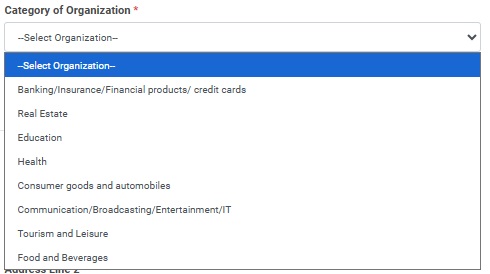
Organization Category: Choose the category that correctly represents your business activity.
Service Type: Select “Both” to enable all communication types.
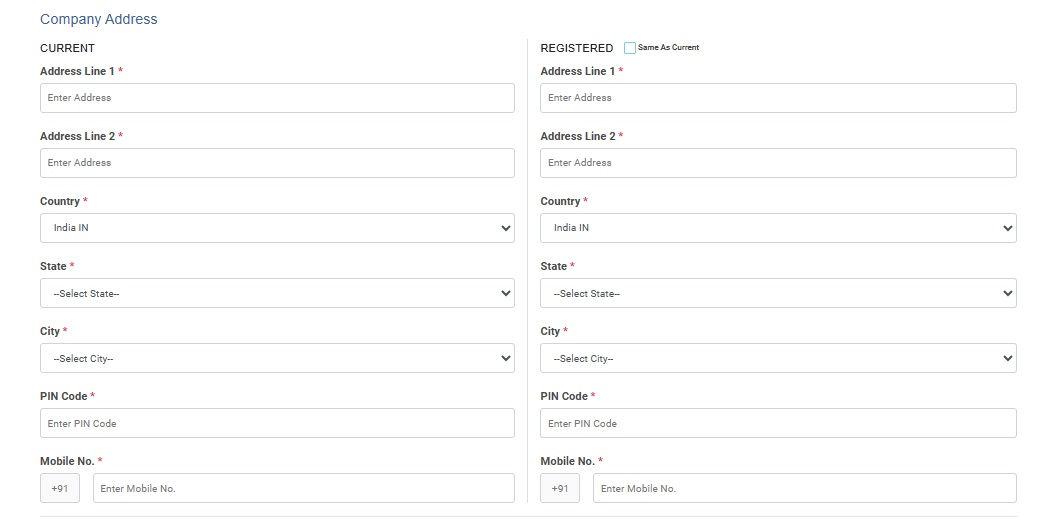
Company Address
Business Address: Enter the address exactly as mentioned in your official business documents.
Mobile Number: Provide an active mobile number. This will be used to receive OTPs for verification, so ensure it is correct and accessible.
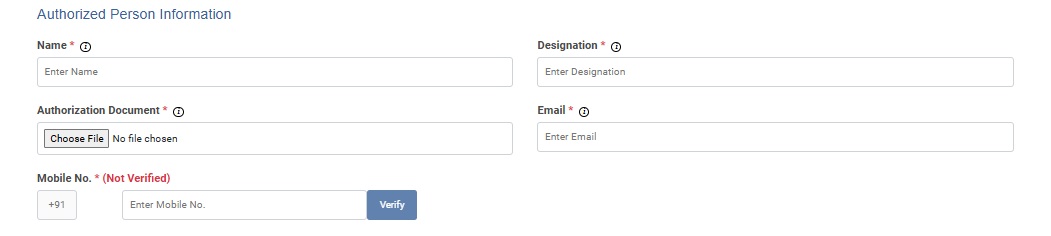
Authorized Person Information
Authorized Person Details: Enter the name, designation, email ID, and mobile number of the person authorized to manage this process on behalf of the business.
OTP Verification: An OTP will be sent to the authorized person’s registered mobile number and email ID. Enter the OTP and click Submit to complete the verification.
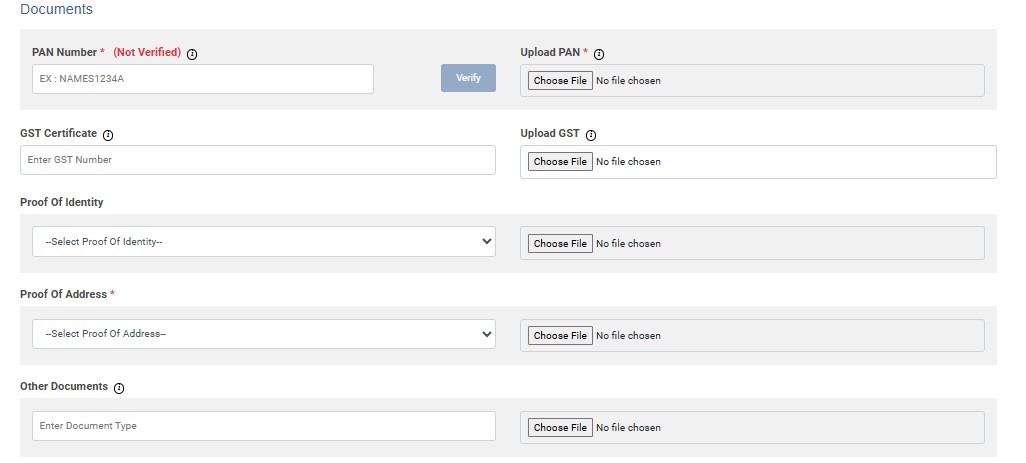
Upload Documents
Upload clear scanned copies of the required business documents listed below:
- PAN Card
- GST Certificate
- Proof of Identity
- Proof of Address
- Any other relevant supporting documents
Note: Please ensure all documents are clear, readable, and scanned from the original copies to avoid verification delays.
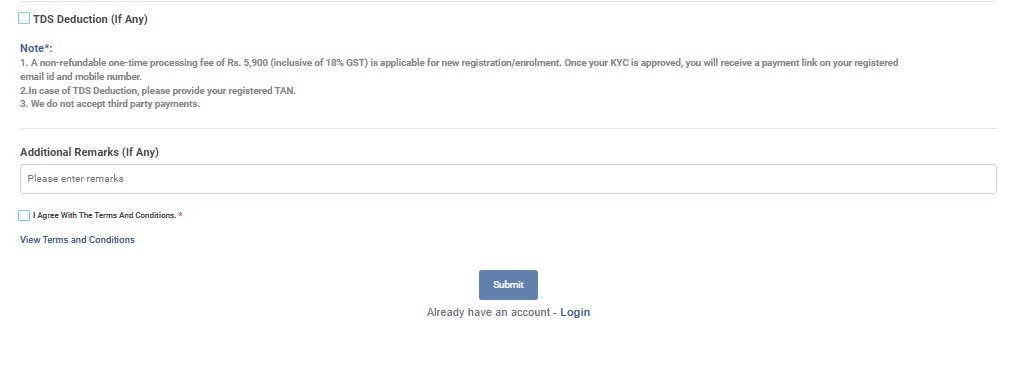
TDS Deduction
During registration, the entity can choose to apply TDS deduction.
By default, 2% TDS is applicable.
If you opt for TDS, uploading the TDS document is mandatory to proceed.
Check Agree documents to agree terms and conditions.
Click on the “Submit”.
Once you submit the form, a verification link will be sent to your registered email address.
- Click OK after reading the message.
- Open your email and click the verification link to confirm your email ID.
Note: If you don’t see the email, please check your Spam or Junk folder as well.
Your DLT registration request will then go through the following approval stages:
- KYC Pending
- The operator reviews and approves your KYC details.
- Once approved, you will receive a payment link on your registered email ID and authorized mobile number.
- Complete the payment of ₹5,900 using the provided link.
- DLT Approval Pending
- After successful payment, the operator reviews your application for final approval.
- After successful payment, the operator reviews your application for final approval.
- Entity Approval & Login Credentials
- Once approved, your DLT login credentials will be sent to your registered email ID.
- Once approved, your DLT login credentials will be sent to your registered email ID.
In case of rejection, you can resubmit and reinitiate the application after making the required corrections.
This completes the DLT registration process on Smartping.
Next Step: Proceed with Header (Sender ID) Registration to continue the setup.
Step 2 : Header Registration
Next step is to register the Sender ID or Header.
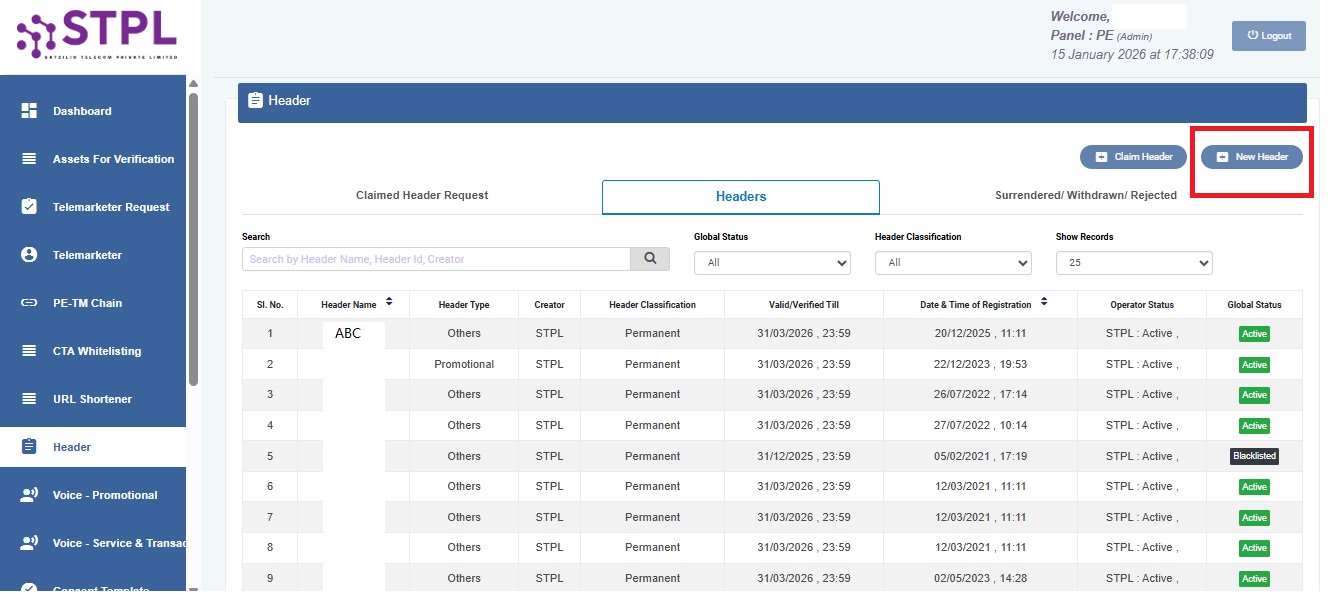
Click on the “Header” in the left sidebar.
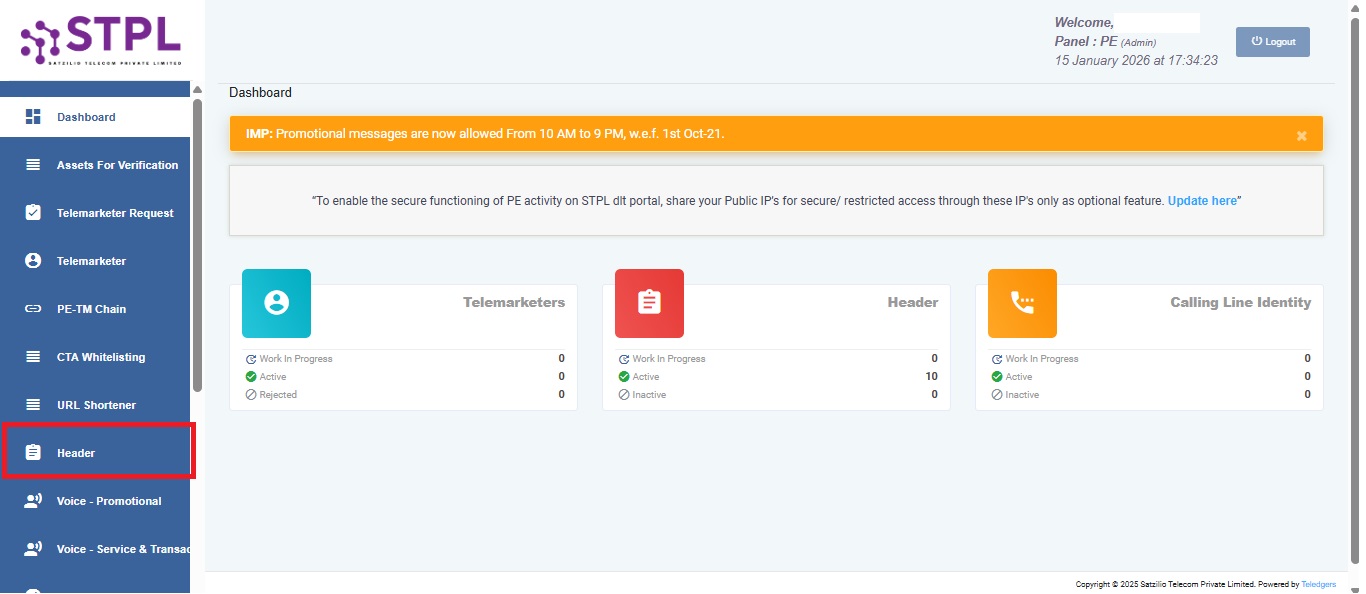
Click on the “New Header” in the right upper corner.
In the Header Registration section,
Header Type: Choose the header as “Promotional” or “Other”. The Promotion type gives you the Numeric sender ID. where as the Others is for the transactional messaging with Alphanumeric sender ID.
Header Classification: Select the “Permanent” if you want to keep the Sender ID lifelong lasting. If you select the Temporary, give the lasting validity. The validity will expire automatically.
Category: select the business matching category with business.
Header Name: The “Header Name” is dependent on the “Header Type” selected. For the Promotional type, the 6 digit numeric “Sender ID” is valid whereas if Header Type is selected as Other, an Alphanumeric Sender ID is valid.
Note:
Promotional – Messages which are purely promotional in nature sent to all the prospects in the database by an Entity basis on their preferences. Ex: All kinds of Promotional messages. Will be created.
Others– Includes Transactional, Service Implicit and Service Explicit messages
Upload Doc: upload the related document that matches the business category as well as business name give you a clear idea to define the Sender ID match.
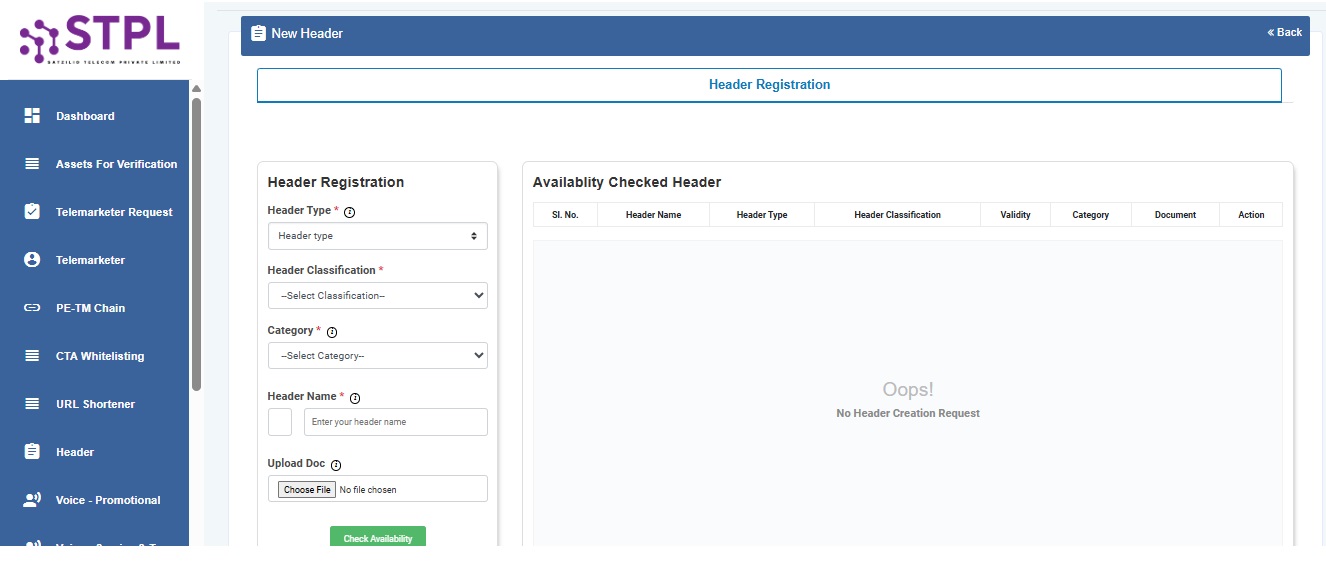
Check Availability
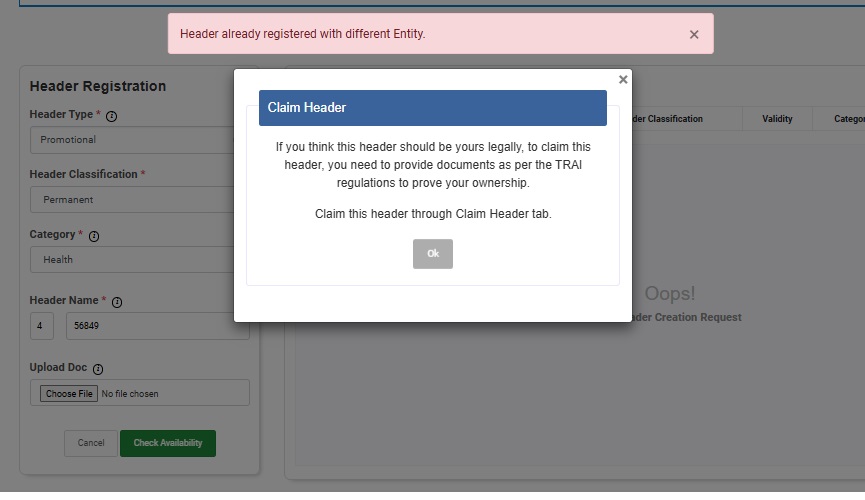
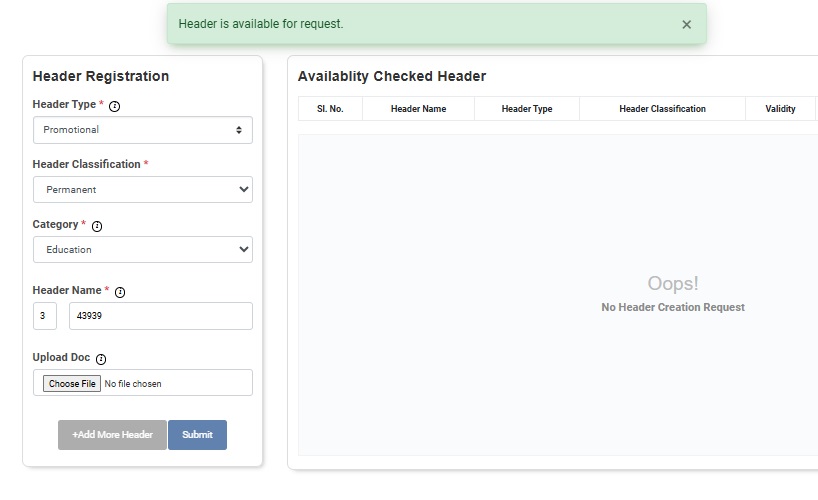
Click on the “Check availability” button in the end. It will check if the sender id does not match with existing. If it matches, you need to change the sender id and check the availability again.
If it is available to create a new Header. Click on the “Submit”.
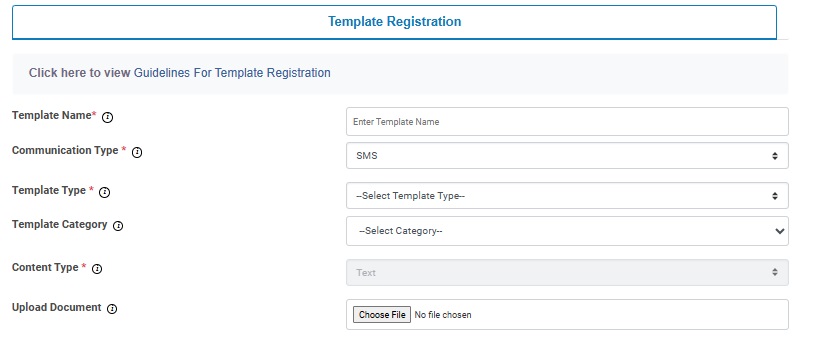
Step 3 : Content Template Registration
In this step, we will get approval for the message content.
Click on the “Template” in the left sidebar. Next, click on the “New Template” in the upper right corner.
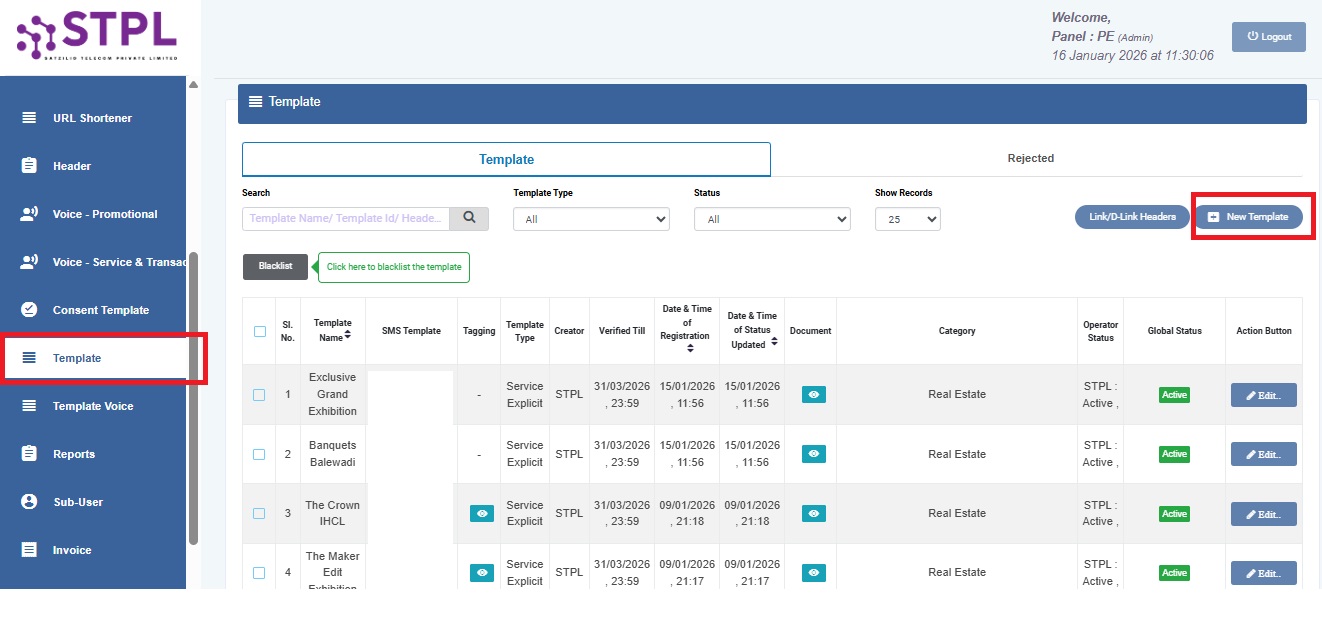
Enter the “Template Name”.
Select the “Communication Type” as “SMS’.
Template Type: Select the type of message content is. This has Promotional, transactional, service explicit and service implicit.
Template Category : Select the template matching category that also matches the business.
Upload the Document: upload the business document that gives a support to content. Like a GST certificate, etc.
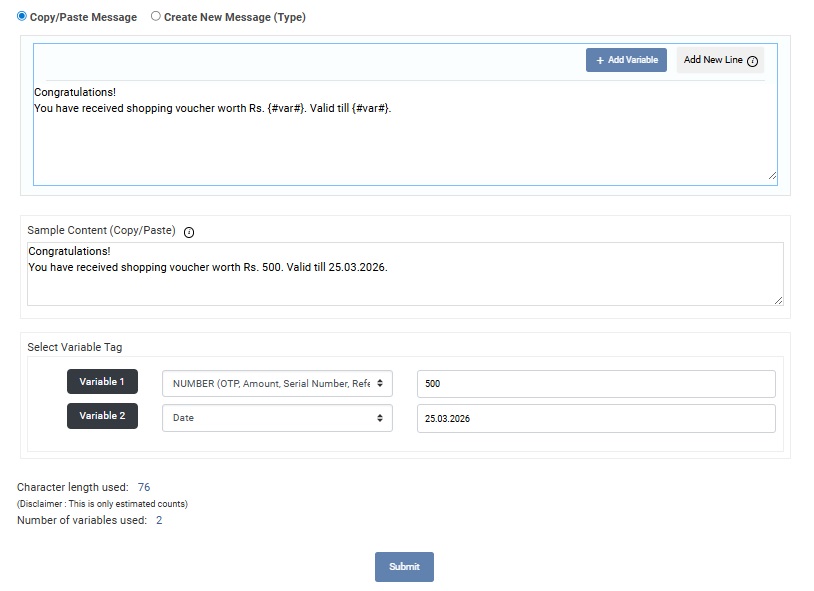
Copy and paste the message content in the textbox.
Use button “+Add Variable” to add the changing data field like Name, dates, etc.
Add a sample message content with dummy data in the variable fields.
Also fill the “Variable Tags” accordingly. “Variable 1” is a number that has value Rs. 500.
Variable 2 is a date that h value 25.03.2026.
Click on the “Submit” to finally send content message for approval.
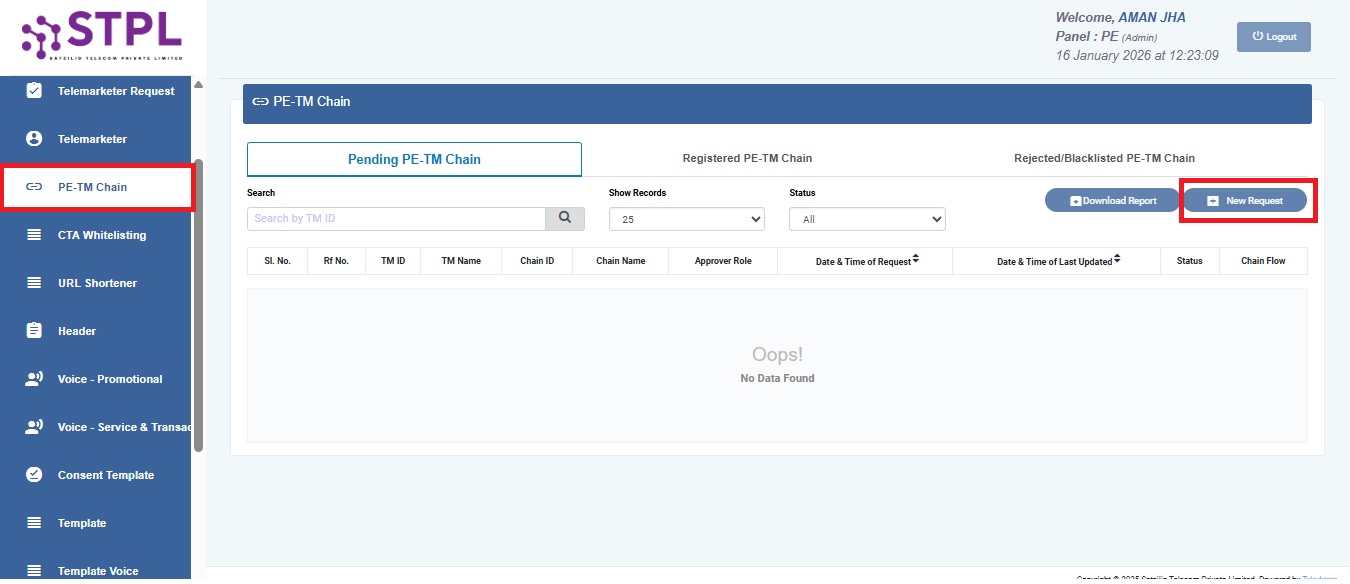
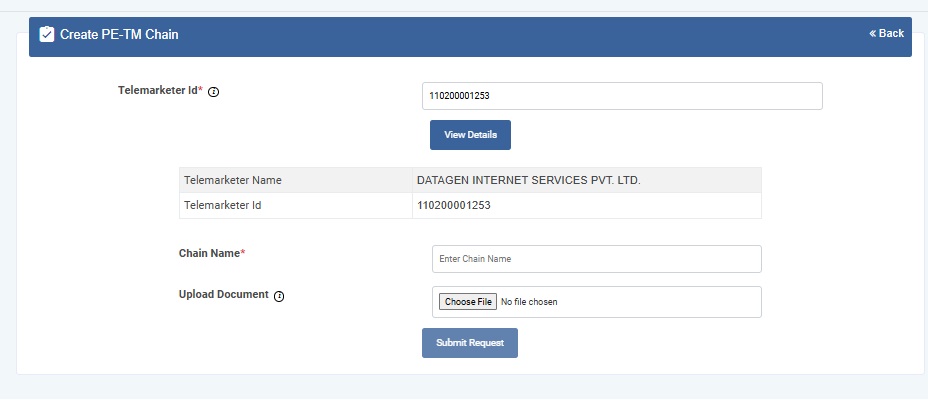
Step 4 : PE-TM Chain Registration
Click on the “PE–TM Chain” in the left sidebar.
Then, click on “New Request” located at the top-right corner of the page.
Enter the Telemarketer ID of your SMS service provider.
For Authkey, the Telemarketer ID is 110200001253 and TM Name is “DATAGEN INTERNET SERVICES PVT. LTD.”
Click on “View Details” to verify and confirm the Telemarketer name.
In the Chain Name field, enter your business/entity name.
Upload a business document such as PAN Card or GST Certificate for easy verification.
Once all details are filled, click on “Submit Request” to complete the process.
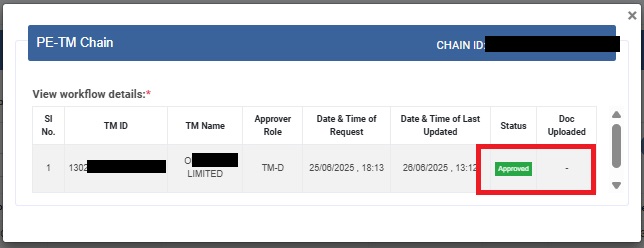
The PE–TM chain binding request will be sent to the Telemarketer account Datagen Internet Services Pvt. Ltd.
For faster approval, please contact your Authkey Account Manager or Support Team.
You can track the status of the chain binding request anytime by clicking on the eye (👁) icon.
This completes the DLT registration process on the Smartping platform. You can now add your DLT details to the Authkey Dashboard and start sending compliant business messages seamlessly.