How to Create/ Upload Contact List for Campaigns?
You can create a contact list directly in the Authkey dashboard. These contact lists can then be used for sending bulk campaigns.
Here’s a step-by-step guide:
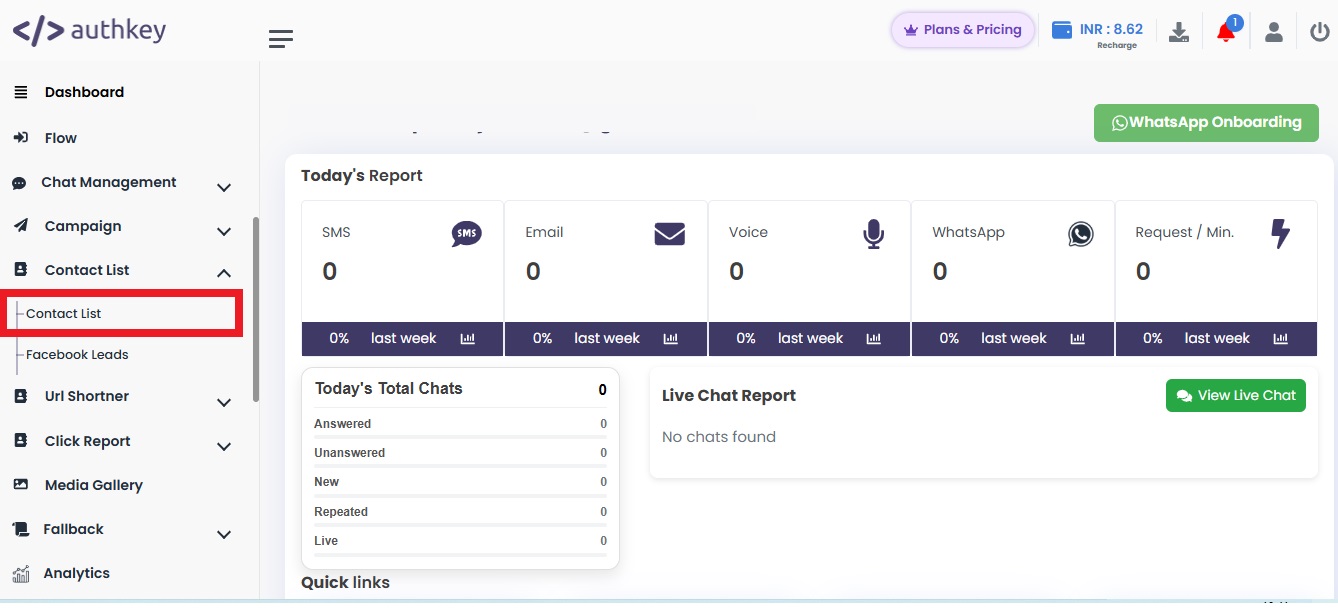
Navigate to Contact List
From the left sidebar, click on the Contact List.
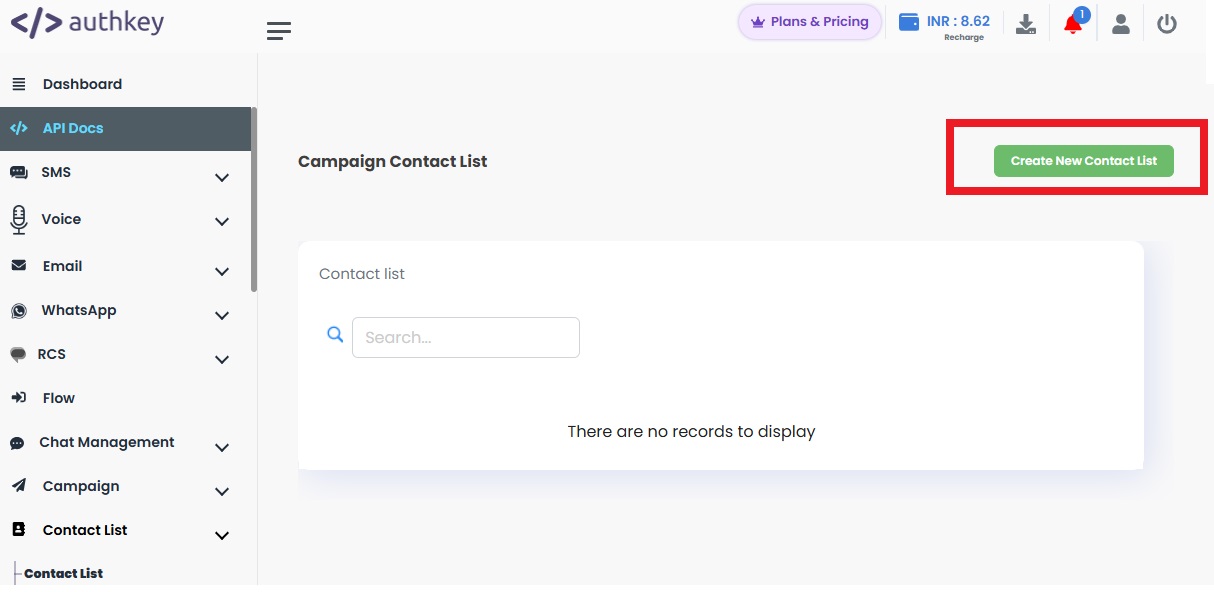
Click on the “Create New Contact List” button.
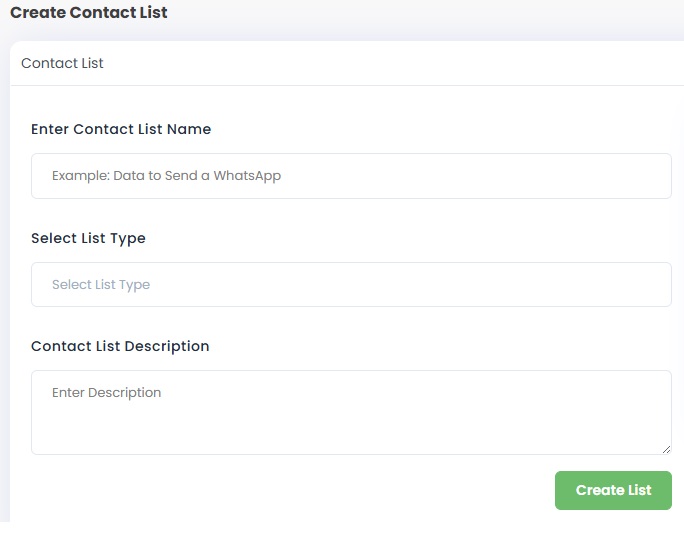
Fill in Contact List Details
While creating a contact list, fill in the following details:
- Provide a clear and identifiable name for the contact list.
Example: Holi_Campaign_List_2026 - List Type: Select the list type as Contact.
- Description: Add a short description for easy identification.
Example: Campaign contact list for Holi promotional offers.
Click on the Create List.
Once the list is created:
- The created list will appear in the dashboard.
- Click on the Upload icon next to the list.

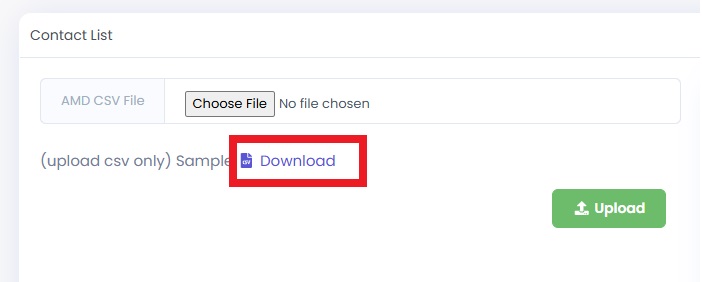
Download Sample File
- Click on the Download button to get the sample file format.
- Open the file and paste your contact numbers in the given column. Save the file on your system.
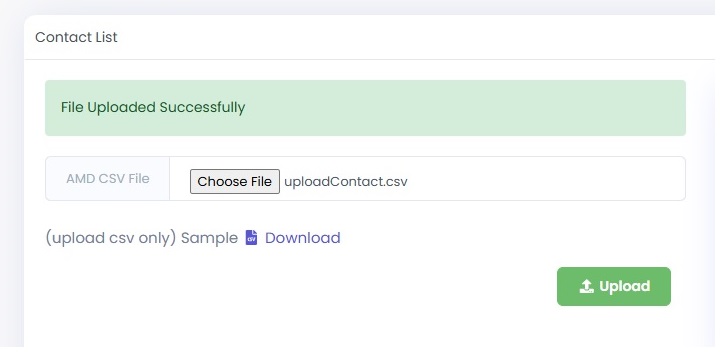
Upload File
- Click on Choose File.
- Select your saved file.
- Click on the Upload button.
Contact List Created Successfully
Once uploaded. The contact list will be created successfully.
It will display the total number of contacts added to the list.

You can now use this contact list while creating bulk campaigns.
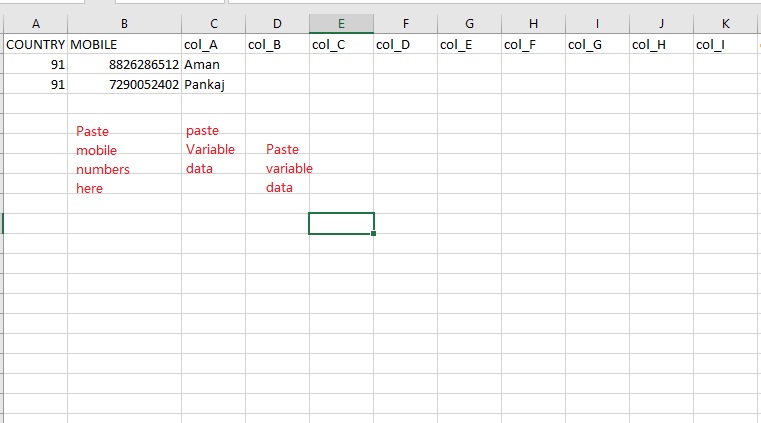
Sample File
The sample file is provided in Excel format (.xlsx).
You can download the sample file and add your data as follows:
- Paste the contact numbers in the Mobile column (include country code, e.g., +91XXXXXXXXXX).
- Add other variable data in the remaining columns.
These additional columns can include:
- Name
- Order ID
- Expiry Date
- Discount Percentage
- City
- Any custom variable required for your campaign
The column data will be mapped to template variables such as:
- {{1}} → Name
- {{2}} → Order ID
- {{3}} → Date
Make sure the file format remains unchanged and save it before uploading to the dashboard for campaign.
 23
23
 2
2