How to Create & Send Bulk RCS Campaign?
Follow this step-by-step guide to create and launch your first Bulk RCS Campaign using Authkey.
Prerequisites
Before creating an RCS campaign, make sure you have:
- Authkey Account – Create your Authkey account here if you don’t already have one.
- RCS Onboarding Completed – Follow this step-by-step guide to get your business RCS-enabled.
- RCS Template Approved – Learn how to submit & get template approval here.
Once these steps are done, you are ready to create a campaign.
Send Bulk RCS Campaign
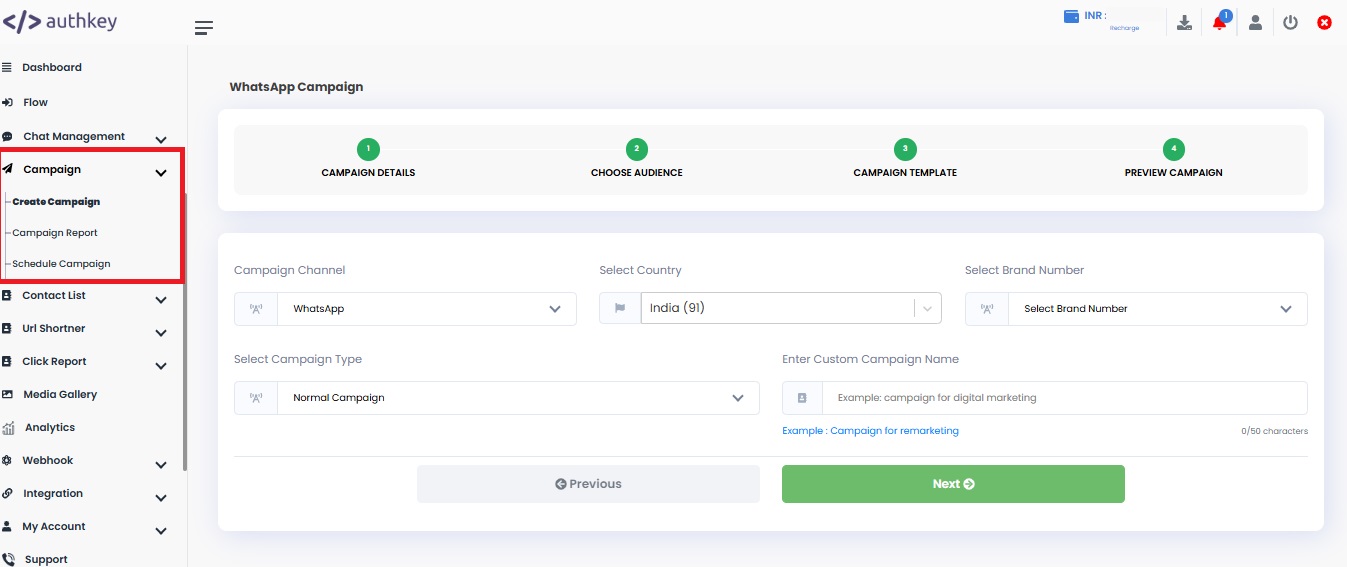
Step 1: Campaign Details
Login to your Authkey account.
Go to Campaign → Create Campaign.
Fill in the following details:
- Campaign Channel: Select RCS.
- Select Country: Choose India (91) (default).
- Campaign Type: Leave as Normal Campaign (default).
- Custom Campaign Name: Enter a name to identify your campaign.
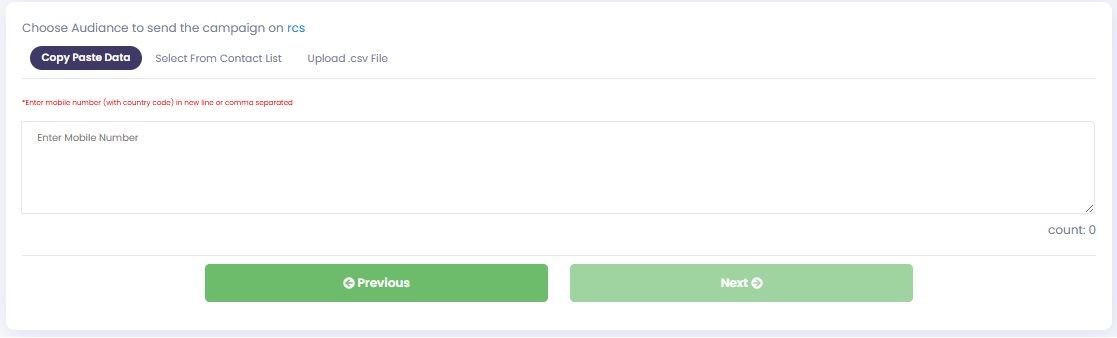
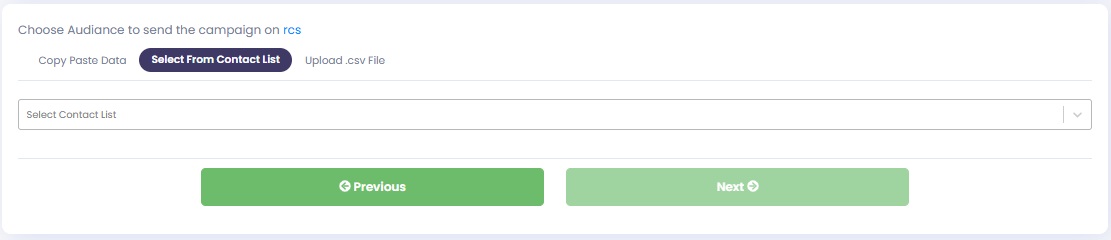
Step 2: Choose Audience
Upload your audience numbers in one of the three ways:
- Copy-Paste Data: Paste phone numbers directly (up to 80k) into the input field.
- Select From Contact List: Choose an existing contact list saved in your Authkey account.
- Upload CSV File: Prepare a .csv file with numbers (without country code 91) and upload it.
Tip: Do not include the country code 91. Keep a number list without country code.
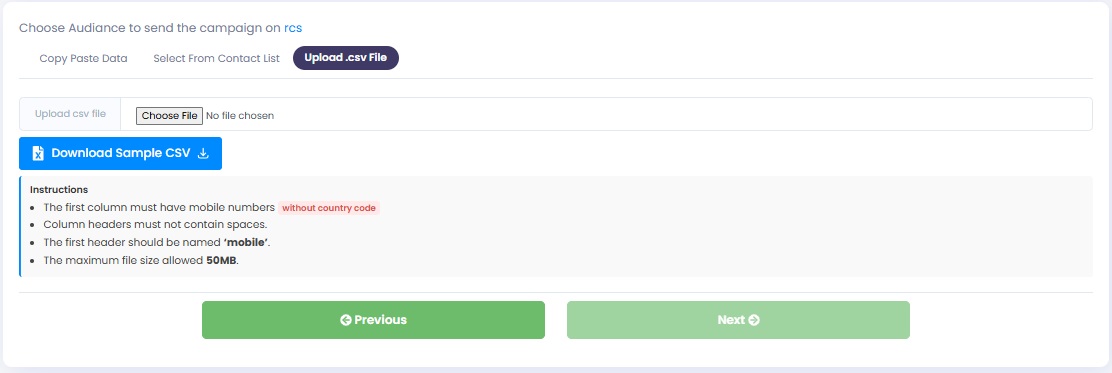
💡 Tip: Choose only one method to upload contacts for each campaign.
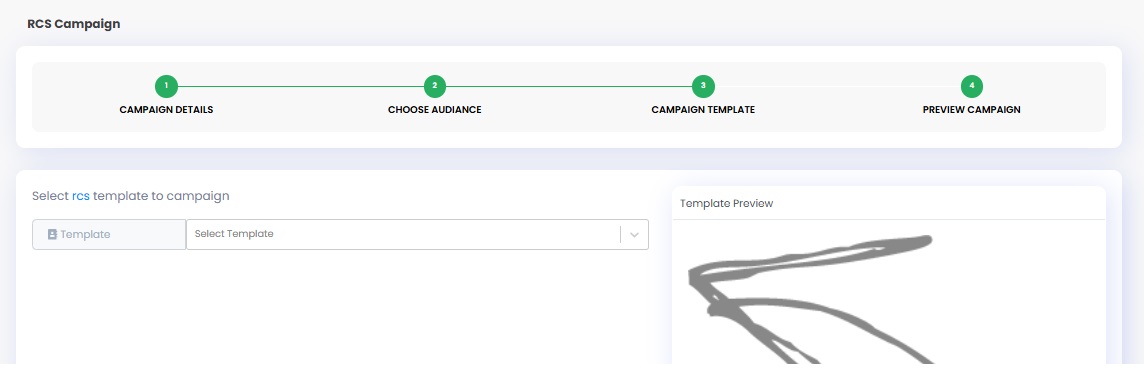
Step 3: Campaign Template
- Select an Approved RCS Template from the dropdown list.
- Only approved templates will be available for selection.
- Fill All the variables details if mentioned in the template.
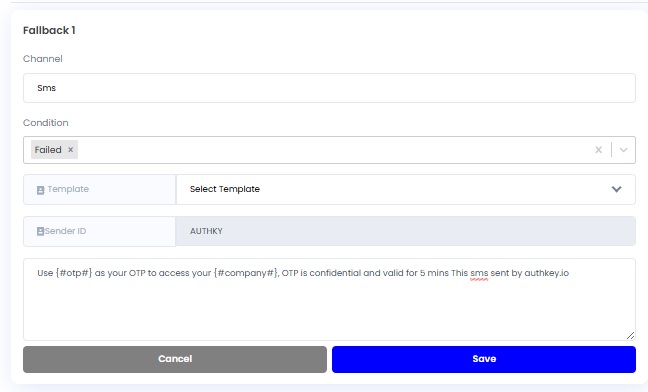
Add Fallback to SMS(Optional)
Add an SMS fallback to ensure message delivery in case RCS fails.
- Click + Add Fallback
- Select Channel: SMS
- Select Condition: Failed
- Choose a DLT-approved SMS Template
- Click Save
Then click Next to proceed.
Click on the Next.
Step 4: Campaign Preview & Launch
- Review all campaign details, including audience and template.
- Click Start Campaign to launch immediately.
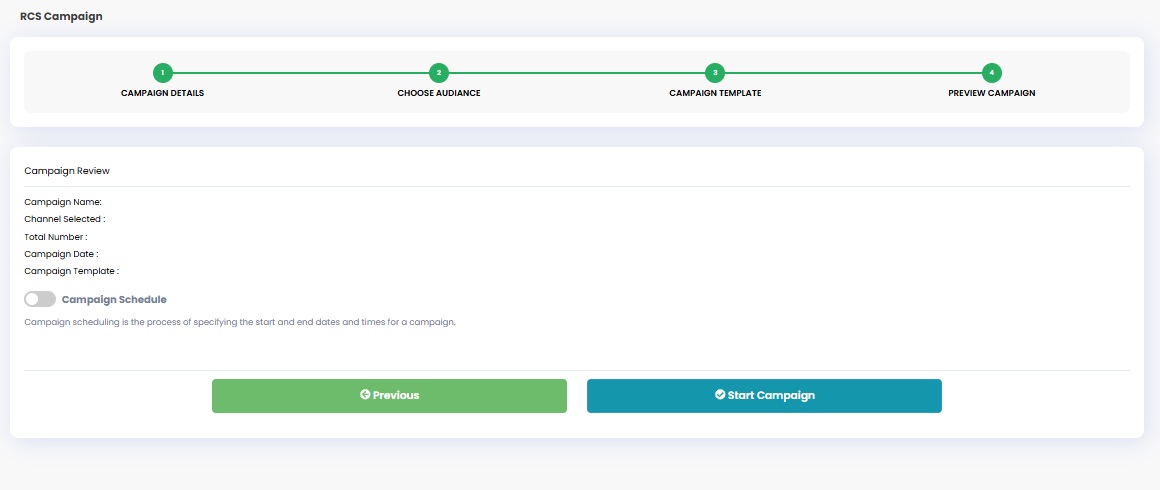
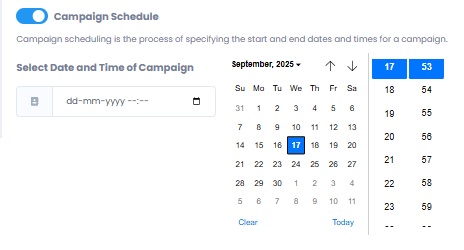
Schedule a Campaign
If you want to schedule the campaign for later:
- Toggle Schedule Campaign to ON.
- Choose Date & Time for sending.
- Click Start Campaign – your campaign will now run as per schedule.
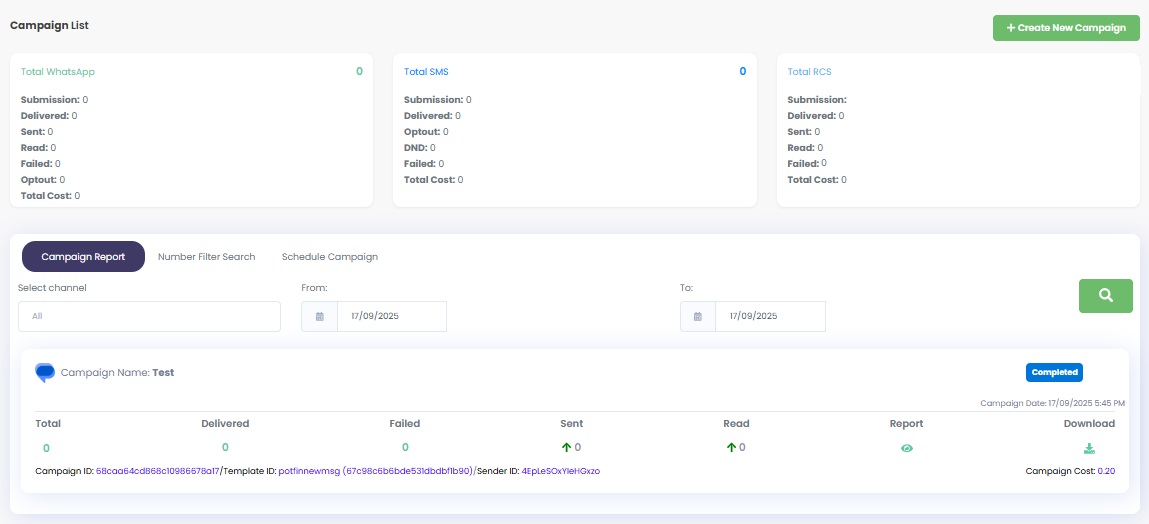
Now Observe the campaign in the Report section for live reports.
 45
45
 2
2